

Mediterranean Preserving: How to Brine Olives, Preserve Lemons & Pickle Vegetables
The first time I bit into an olive I had cured myself, after nine weeks of changing brine, I actually laughed out loud in my kitchen. It was firm, faintly fruity, salty in the way the sea is salty, and nothing like the soft, flat olives I’d been buying in cans my whole life.
I’m not the only one rediscovering these old skills. According to Oregon State University Extension, a 2024 nationwide survey found that 51% of households preserved food using techniques like canning, dehydrating, or fermenting. Yet the CDC warns that improperly home-preserved low-acid foods are commonly linked to botulism, a toxin you can’t see, smell, or taste.
My own path was not graceful. My first batch of olives went into plain water “for a few days” and came out so bitter I spat the first one into the sink. Over two seasons I lost 11 jars to mushy olives, cloudy pickles, and one frightening layer of blue fuzz, roughly $90 of fresh produce, before I discovered the real secret. Preserving isn’t about a magic recipe. It’s about controlling three things: salt, acid, and time.
If you’ve been winging it with “a pinch of salt” and whatever vinegar is in the cupboard, you’re gambling with both flavor and safety. And if you’re brand new to this way of eating, start with my Mediterranean diet guide for beginners to see where these briny jars fit on your plate.
Here’s what two seasons of trial and error taught me: every Mediterranean preserve, from Greek olives to Moroccan lemons to Lebanese pink turnips, works by making life impossible for spoilage microbes and delicious for us. Once you understand how salt draws out water, how acid blocks dangerous bacteria, and how fermentation builds flavor, you can preserve with confidence. In this guide, I’ll walk you through curing olives three ways, making preserved lemons, pickling and fermenting vegetables, and storing everything safely.
Safety note: This guide covers traditional methods using research-based guidance from university extension services. Home preserving carries real food-safety risks. Always follow tested recipes for anything you plan to store at room temperature, and when in doubt, keep it in the refrigerator or throw it out.
Why Mediterranean Cooks Preserve: The Science of Salt, Acid, and Time
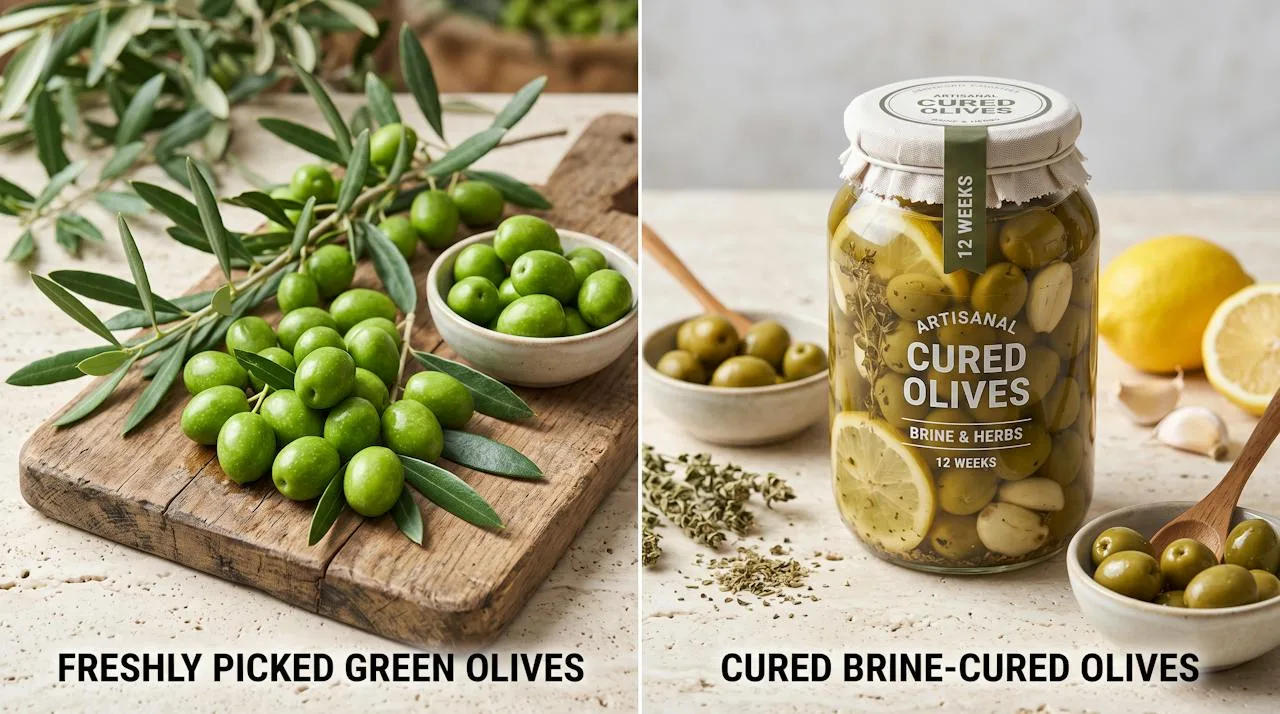
For thousands of years, the jar on the shelf was the Mediterranean family’s refrigerator, and the rules it followed are the same ones you’ll follow today.
Preserving Is Part of the Mediterranean Diet Itself
When UNESCO recognized the Mediterranean diet as part of humanity’s Intangible Cultural Heritage, it described more than a list of foods. It described a whole set of skills and traditions, including how people harvest, fish, preserve, process, cook, and share food. In other words, the jars of olives, lemons, peppers, and capers lining a Cretan or Moroccan pantry are not side notes. They’re part of the tradition.
Preserving solved a practical problem: gluts. Olives ripen all at once in the fall. Lemons pile up in winter. Summer gardens overflow with peppers, turnips, and cucumbers. Salt, vinegar, and patience turned a few weeks of abundance into a year of flavor.
The Three Tools: Salt, Acid, and Fermentation
Nearly every preserve in this guide relies on some combination of three tools:
- Salt pulls water out of food and makes the environment hostile to many spoilage organisms. It’s the backbone of brine-cured olives, preserved lemons, and fermented vegetables.
- Acid lowers the pH. Vinegar pickles get their acid added directly; preserved lemons bring their own.
- Fermentation is acid you grow yourself. Friendly lactic acid bacteria eat natural sugars and produce lactic acid, which sours and protects the food over days or weeks.
The magic number is pH 4.6. The University of Minnesota Extension explains that a pH of 4.6 or below helps minimize the risk from Clostridium botulinum, the bacterium behind botulism, by keeping its spores from germinating and producing toxin.
COMMON MISTAKE: Assuming “it’s pickled, so it’s safe.” Safety depends on getting enough acid (or salt, or both) into every piece of food. Cutting the vinegar, diluting the brine, or packing jars too tightly can leave pockets that never reach safe acidity.
Why Olives Can’t Be Eaten Straight From the Tree
If you’ve ever tasted a raw olive, you know it’s shockingly bitter. A review in the journal Foods, “Table Olives More than a Fermented Food”, explains that the culprit is a compound called oleuropein. Before olives can be eaten, that bitterness has to be removed through alkaline treatment, brining or salting, fermentation, or acidification.
During brine fermentation, lactic acid bacteria break oleuropein down into non-bitter compounds, including hydroxytyrosol. That’s why patience matters so much with olives: the flavor isn’t just seasoned, it’s transformed.
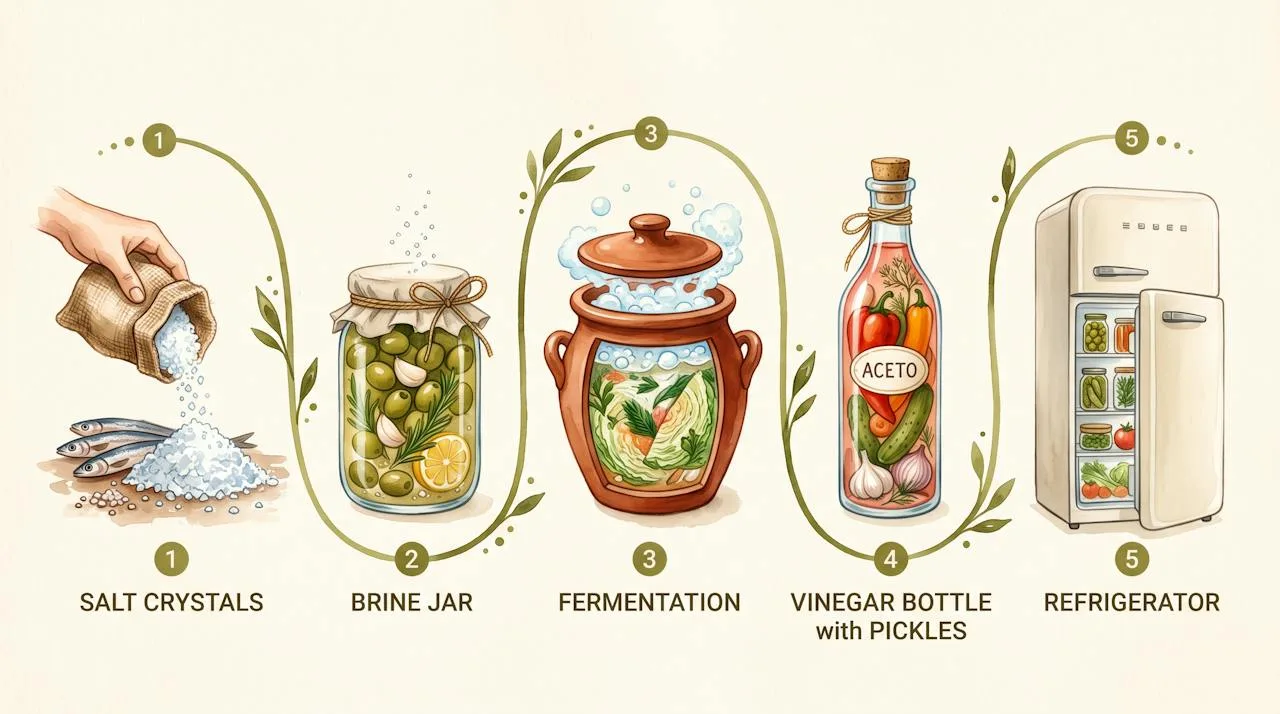
Choosing the Right Method
Here’s how the main Mediterranean preserving methods compare:
- Water curing: Fastest way to tame bitterness in olives (about 1–3 weeks), but the olives must then go into brine or the fridge.
- Brine curing: Slow (2–6 months for olives) but produces the most complex, classic flavor.
- Dry salt curing: Produces wrinkled, intense black olives in about 5–6 weeks.
- Salt and citrus (preserved lemons): About 3–4 weeks of curing, then refrigeration.
- Quick vinegar pickles: Ready in a day or two, stored in the refrigerator.
- Lacto-fermentation: 1–4 weeks at room temperature, then refrigerated.
Essential Preserving Ingredients and Equipment
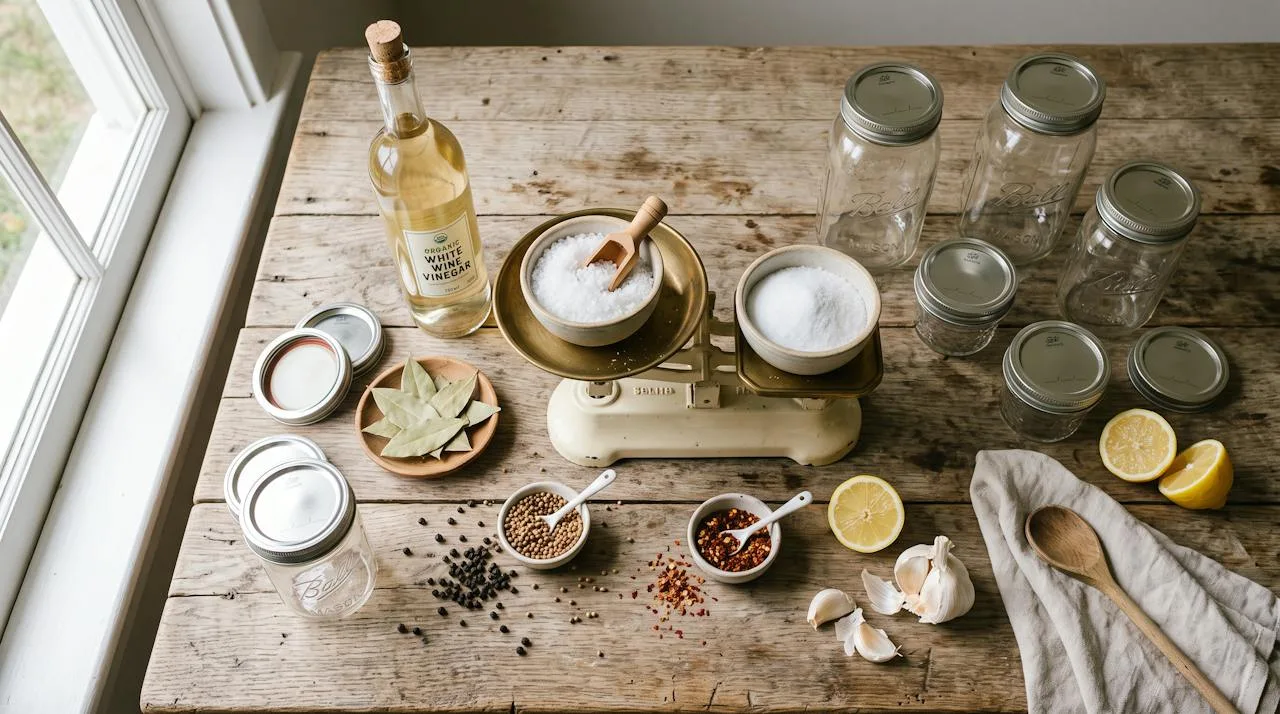
The good news: you probably own half of what you need already. The bad news: the half you don’t own is the half that matters most for safety.
Salt: Not All Salt Is Equal
Salt is the most important ingredient in this guide, and the wrong kind can quietly ruin a batch.
- Pickling or canning salt: Pure sodium chloride with no additives. This is the gold standard.
- Kosher salt: Fine if it has no anti-caking agents, but its large flakes take up more room, so volume measurements won’t match.
- Sea salt: Beautiful for finishing, but may contain minerals that affect color and texture.
- Iodized table salt: Avoid for preserving.
Illinois Extension recommends canning and pickling salt for fermentation. It notes that table salt can make brine cloudy and iodized salt can slow fermentation. New Mexico State University’s guide to pickled and fermented foods adds that flaked kosher salt takes up noticeably more volume than granular pickling salt, so cup-for-cup swaps don’t work.
MEDITERRANEAN SECRET: Weigh your salt. A $15 kitchen scale is the single best investment you’ll make in preserving. Two cups of different salts can hold wildly different amounts of actual salt, but 100 grams is always 100 grams.
Vinegar: Check the Label
For vinegar pickles, acidity is non-negotiable. NMSU’s guide calls for high-grade cider or white distilled vinegar of 5% acidity. It warns against reducing the vinegar or using homemade vinegar of unknown strength.
This matters more than you’d think. The University of New Hampshire Extension has warned home preservers that some vinegars on store shelves are sold at lower acidity (around 4%). Food canned in tested recipes using that weaker vinegar may not be safe. Always check the label for “5% acidity” or higher.
White wine vinegar and red wine vinegar bring wonderful Mediterranean flavor. Just confirm they’re labeled at least 5%. Penn State Extension explains why: the acid has to be strong enough to bring the whole product to a safe pH.
Water, Produce, and Aromatics
- Water: Use clean, cool water. If your tap water is heavily chlorinated, let it sit out overnight or use filtered water for fermented recipes, since chlorine can slow the good bacteria.
- Produce: Choose the freshest, firmest, blemish-free produce you can find. Preserving never improves tired vegetables.
- Aromatics: Garlic, bay leaves, oregano, thyme, fennel seed, coriander seed, peppercorns, dried chilies, and citrus peel are the classic Mediterranean flavorings.
Equipment Checklist
- Glass jars with clean, new lids (wide-mouth jars are easiest to pack)
- Fermentation weights or a small zip-top bag filled with brine to keep food submerged
- A kitchen scale
- A non-reactive pot (stainless steel or enamel, never aluminum or copper for vinegar brines)
- A wooden mallet or the flat side of a heavy knife for cracking olives
- Masking tape and a marker for labeling dates
COMMON MISTAKE: Using a reactive metal pot for hot vinegar brine. Aluminum and copper react with acid, which can discolor pickles and give them a metallic taste. Stick with stainless steel, enamel, or glass.
How to Cure Olives at Home
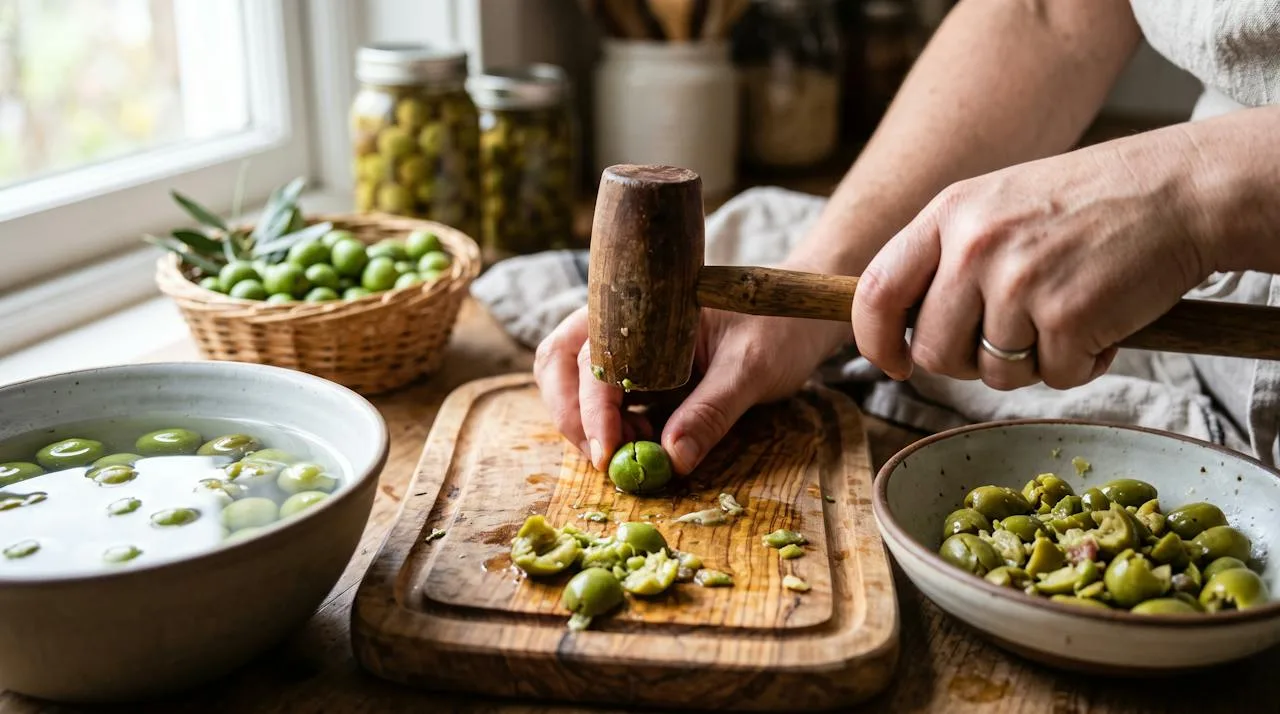
This is the heart of Fig & Brine, and it’s the skill that finally made me feel like a real Mediterranean cook.
Finding Fresh Olives
You can’t cure store-bought olives; they’re already cured. You need fresh, raw olives, which are harvested in the fall. In the U.S., look for them at farmers markets in olive-growing regions, from specialty growers who ship fresh fruit, or from a neighbor’s tree. Choose firm olives without bruises or insect damage, and cure them within a day or two of picking.
Green olives are picked before they ripen and stay firm. Black (fully ripe) olives are softer and a little milder. The University of California’s publication Olives: Safe Methods for Home Pickling notes that green-ripe olives take longer to cure in brine than naturally black ripe olives.
Method 1: Water Curing (Beginner-Friendly)
Water curing is the gentlest way to start. It pulls bitterness out slowly with daily soaks.
- Crack or slit each olive. Tap each one with a mallet until the skin splits (keep the pit intact), or cut two or three lengthwise slits. This lets water reach the flesh.
- Cover with cool water in a large jar or food-safe bucket. Weigh the olives down so none float.
- Change the water daily. UC’s guide calls for daily water changes for about 8 to 10 days, or up to 20 days for milder olives. It warns that over-soaking leads to soft olives.
- Taste as you go. Starting around day 7, taste one olive each day. They’re ready when the bitterness is gentle, not gone entirely; a little bitterness is part of the charm.
- Move them into a flavoring brine and refrigerate. Water-cured olives are not preserved by the water alone; they need salt brine and cold storage.
MEDITERRANEAN SECRET: Crack olives the moment you get home. The sooner the skin is broken, the more evenly they cure, and the less time they spend oxidizing and bruising on the counter.
Method 2: Brine Curing (The Classic)
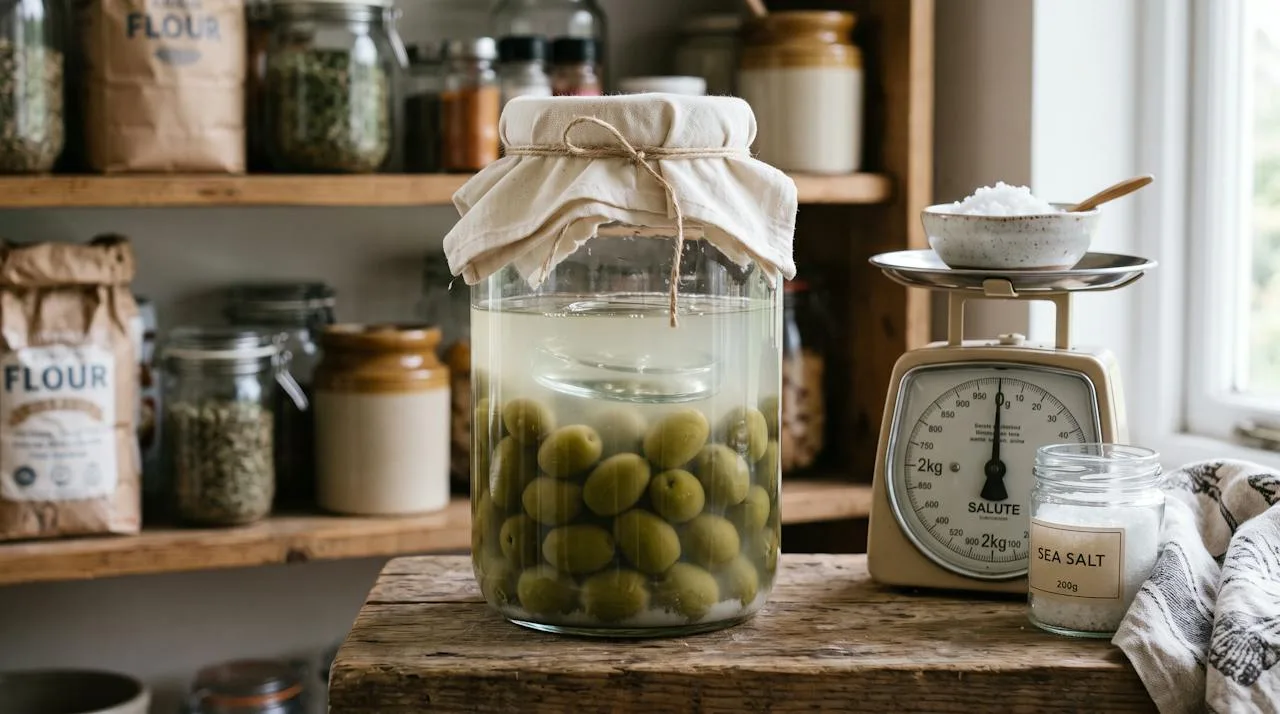
Brine curing is slower but produces the olives I dream about: firm, complex, and gently fermented. According to UC’s home pickling guide:
- Start with a lighter brine. Dissolve 8 ounces (about ¾ cup) of pickling salt per gallon of cool water. Cover the cracked or slit olives completely.
- Strengthen it after a week. After 7 days, replace it with a stronger brine of 1 pound (about 1½ cups) of pickling salt per gallon of water.
- Keep everything submerged. Use a weight or a brine-filled bag. Any olive poking above the surface can grow mold.
- Wait. Brine-cured olives need a minimum of 2 to 3 months, and up to 6 months for fuller flavor.
- Taste and desalt. Olives held in heavy brine are very salty. UC notes that heavily brined olives should be soaked in fresh water before eating to remove excess salt.
The brine will turn cloudy, and you may see a thin white film form on top. We’ll talk about what’s normal and what isn’t in the troubleshooting section below.
Method 3: Dry Salt Curing (Wrinkled Black Olives)
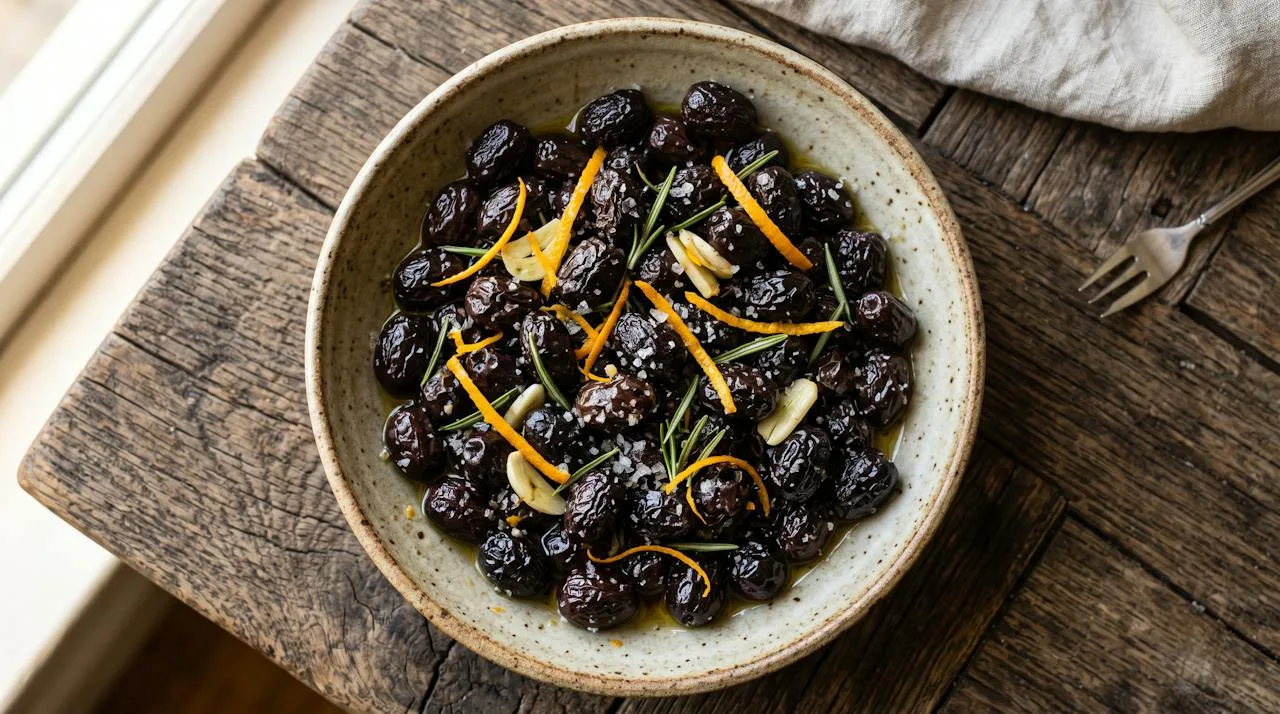
Dry-cured olives are the intense, wrinkly black olives you see in Moroccan and Greek markets. They’re made with fully ripe black olives and a lot of salt. UC’s guide calls for:
- 1 pound (about 1½ cups) of pickling salt for every 2 pounds of olives
- Layering olives and salt in a container that allows liquid to drain (a basket or slatted box lined with cheesecloth works well)
- Re-mixing the olives and salt about once a week
- Roughly 5 to 6 weeks of curing, until the olives are shriveled and no longer bitter
Once cured, shake off the excess salt. UC recommends refrigerating dry-cured olives for up to 6 months or freezing them for up to a year. Before serving, I toss them with a little olive oil, orange zest, and rosemary.
What About Lye-Cured Olives?
Commercial “California-style” black olives and many Spanish-style green olives use food-grade lye to remove bitterness in days instead of months. It works, but lye is caustic and requires careful handling, gloves, eye protection, and precise instructions. If you want to try it, follow UC’s publication exactly. For most home cooks, I recommend starting with water or brine curing.
COMMON MISTAKE: Water-bath canning your olives. UC’s guide is explicit: never use a boiling water bath or a steam canner for olives. Lye-cured, non-fermented olives are low-acid, and improperly canned home olives have caused botulism. Store olives in brine in the refrigerator, or follow UC’s pressure-canning instructions to the letter.
Seasoning and Serving Your Olives
Once your olives are cured and desalted to your taste, the fun begins. Drain them and store them in the refrigerator in a light brine. Before serving, marinate a small batch with:
- Lemon zest and a few thin slices of preserved lemon
- Crushed garlic and fennel seed
- Fresh oregano or thyme
- Chili flakes or Calabrian chilies
- A splash of red wine vinegar and a drizzle of olive oil
One important rule: marinate small amounts to eat soon. The CDC advises refrigerating homemade oils made with garlic or herbs and throwing them away after 4 days. Garlic and herbs sitting in oil can create conditions where botulism can grow. I mix only what we’ll eat within a few days.
READER STORY: Teresa from Sacramento, California, wrote to tell me she finally cured the olives from her backyard tree after years of watching them fall on the patio. “I followed the two-step brine and waited three months,” she said. “My father, who grew up in Calabria, ate half the jar standing at the counter.”
How to Make Preserved Lemons
If olives teach you patience, preserved lemons teach you how much flavor can hide in a rind most of us throw away.
What Preserved Lemons Are
Preserved lemons are a staple of Moroccan cooking and a treasured ingredient across North Africa and the Middle East. Whole or quartered lemons are packed in salt and their own juice, then left to cure for several weeks. The rinds soften and turn silky, and the flavor shifts from sharp and sour to deep, floral, salty, and almost savory.
UC Master Food Preservers describe salted lemons as a simple preserve that needs no special heat processing, relying instead on high salt content and acidity followed by refrigeration. Stored in the refrigerator, they note, preserved lemons keep for at least 6 months.
My Preserved Lemon Method
Here’s the method I use. Organic or unwaxed lemons are best since you’ll eat the peel. Scrub them well either way.
- Sterilize or thoroughly wash a glass jar with hot, soapy water and rinse well.
- Cut each lemon into quarters from the tip, stopping about ½ inch from the base so the quarters stay attached, like a flower.
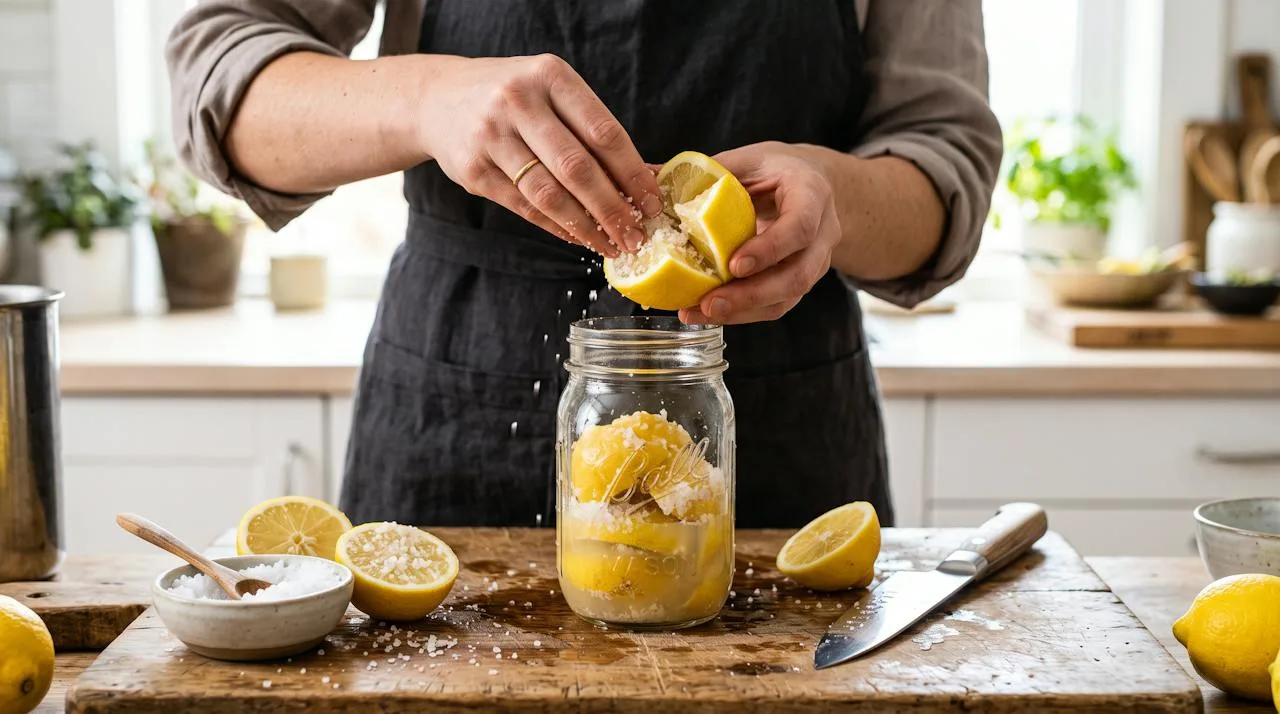
- Pack with salt. Open each lemon over a bowl and generously fill the cuts with coarse kosher or pickling salt, roughly 1 to 2 tablespoons per lemon.
- Pack the jar tightly. Press the lemons into the jar so their juice rises. Sprinkle more salt between layers. Add optional spices like a bay leaf, a cinnamon stick, or a few coriander seeds.
- Top up with juice. Squeeze fresh lemon juice over the top until the lemons are completely submerged.
- Cure. Close the jar and leave it at cool room temperature for about 3 to 4 weeks, turning or shaking it once a day to redistribute the salt and juice. Keep the lemons under the liquid.
- Refrigerate. When the rinds are soft and translucent, move the jar to the refrigerator.
How to Use Preserved Lemons
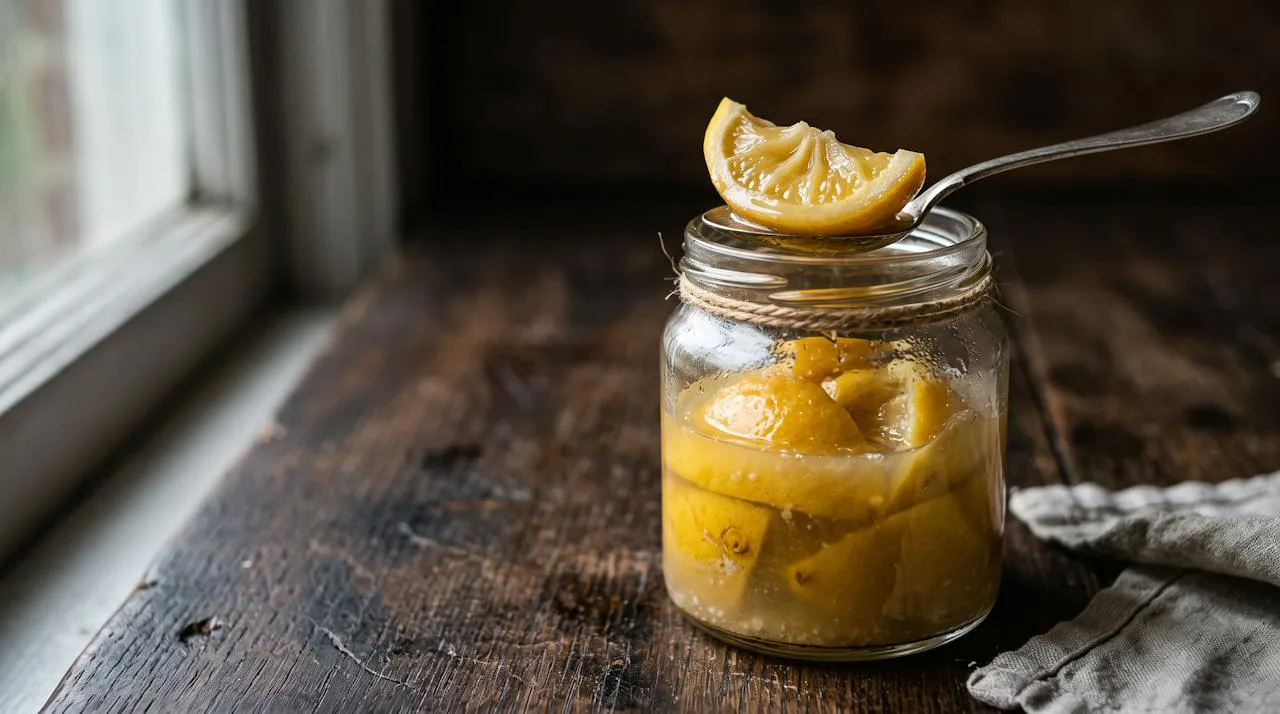
To use, pull out a piece, rinse off the salt, and scrape away the pulp if you prefer (many cooks use only the rind). Then finely chop or slice the rind. A little goes a long way:
- Stir into a chicken or chickpea tagine near the end of cooking
- Fold into couscous, farro, or grain salads
- Whisk into vinaigrettes and yogurt sauces
- Scatter over roasted vegetables or fish
- Mash into butter or olive oil for bread
MEDITERRANEAN SECRET: Save the brine. A spoonful of preserved lemon brine in a salad dressing or marinade adds salt and bright citrus at the same time. Just reduce the other salt in the recipe.
READER STORY: Hannah from Minneapolis, Minnesota, started a jar of preserved lemons during a February cold snap. “By March, my whole kitchen smelled like sunshine,” she told me. “Now I make a jar every winter when lemons are cheapest.”
Pickling and Fermenting Vegetables the Mediterranean Way
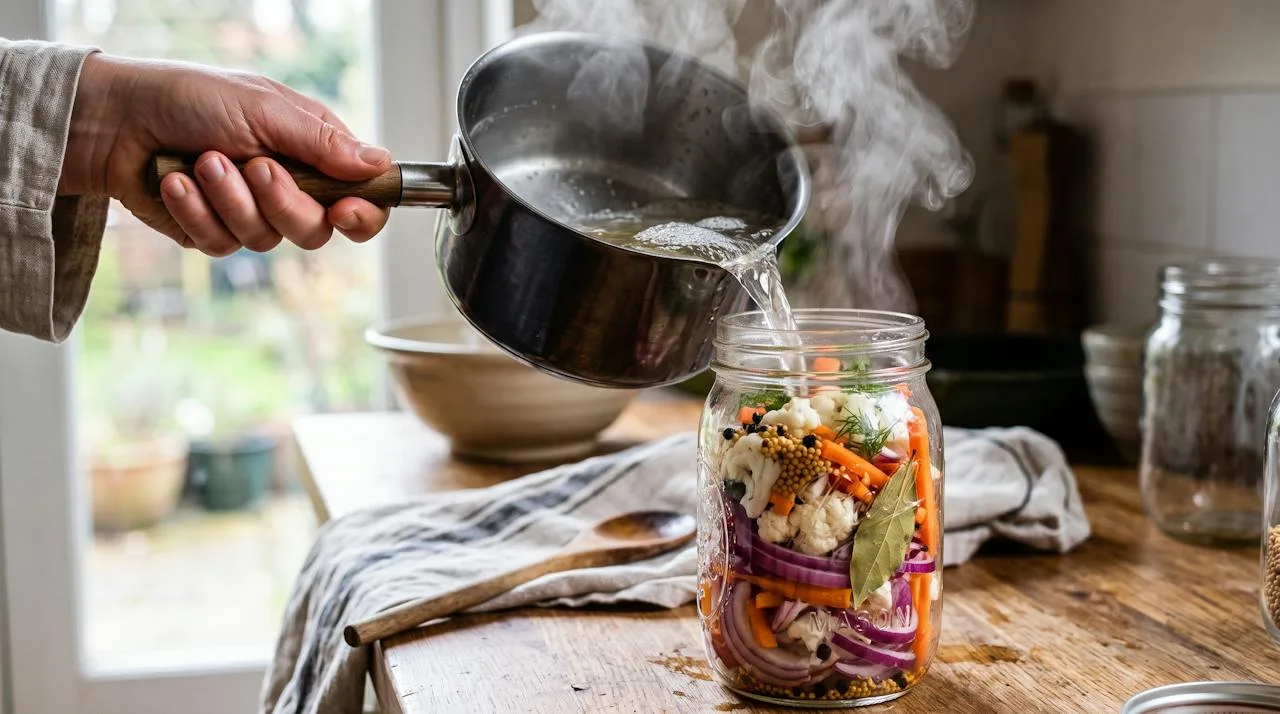
From Turkish turşu to Lebanese kabees to Italian giardiniera, every Mediterranean kitchen has its own pickles, and they all come down to two techniques.
Quick Vinegar Pickles (Refrigerator Pickles)
Quick pickles are the easiest entry point to preserving. You pour a hot vinegar brine over raw vegetables, let them cool, and refrigerate. They’re ready in a day or two.
A basic Mediterranean refrigerator brine:
- Equal parts 5% acidity vinegar (white wine, red wine, or cider) and water
- Salt and a little sugar to taste
- Aromatics: garlic, bay leaf, mustard seed, coriander seed, peppercorns, dill, or chili
Great vegetables to quick-pickle:
- Red onions (ready in 30 minutes, perfect on everything)
- Cauliflower and carrots
- Green beans
- Cucumbers
- Peppers and chilies
Refrigerator pickles are not shelf-stable because they aren’t heat-processed. NMSU’s guide suggests enjoying refrigerator pickles within about 2 weeks. Keep them cold, use a clean fork every time, and discard any batch that turns slimy or smells off.
COMMON MISTAKE: Storing refrigerator pickles in the pantry. If a recipe wasn’t processed using a tested canning method, it belongs in the refrigerator, full stop.
Pickled Turnips (Lebanese Lift)
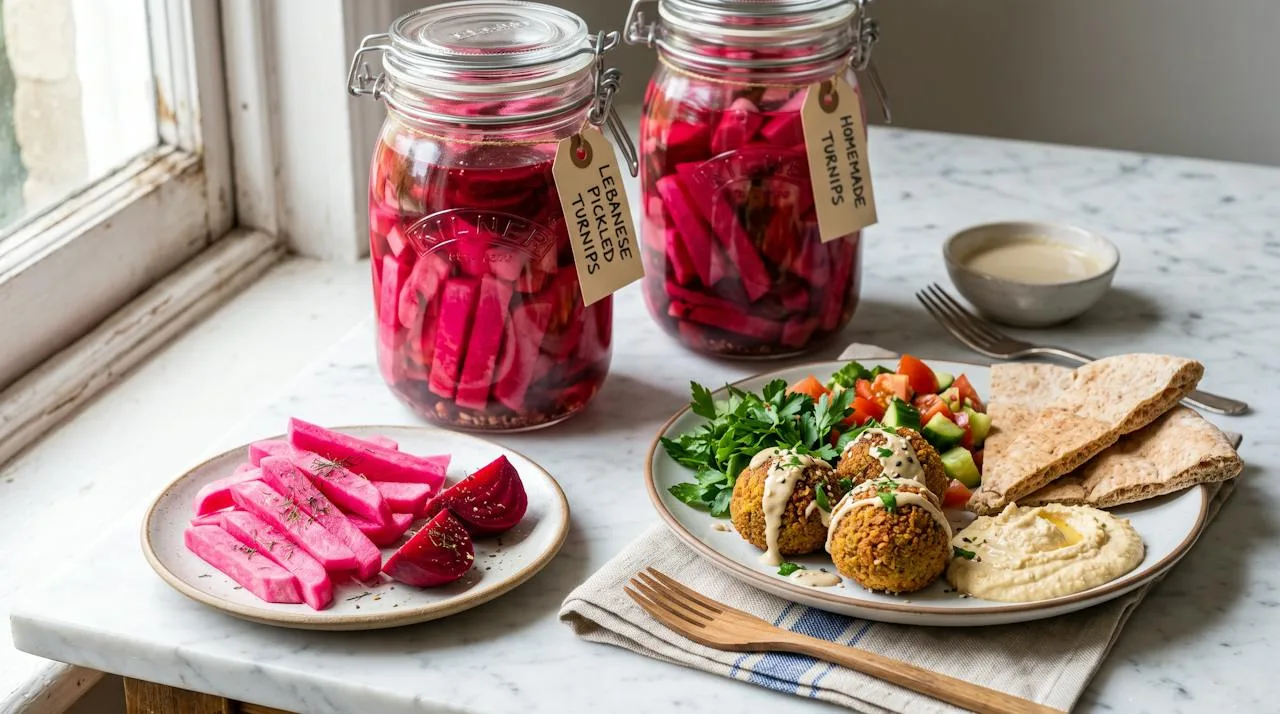
These shocking-pink pickles are the ones people always ask about. They get their color from a few slices of raw beet tucked into the jar, and their crunch makes them the perfect partner for falafel, shawarma, and hummus.
To make them as a refrigerator pickle:
- Peel turnips and cut them into thick batons.
- Pack them into a clean jar with 2 or 3 thin slices of raw beet and a smashed garlic clove.
- Pour over a brine of equal parts 5% white vinegar and water, with salt dissolved in it.
- Refrigerate and wait. The color spreads within a day and deepens over several days.
The turnips stay crisp and tangy and turn a deeper magenta every day. Many families make them as a fermented pickle at room temperature too, but the refrigerator vinegar method is the easiest place to start.
Lacto-Fermented Vegetables
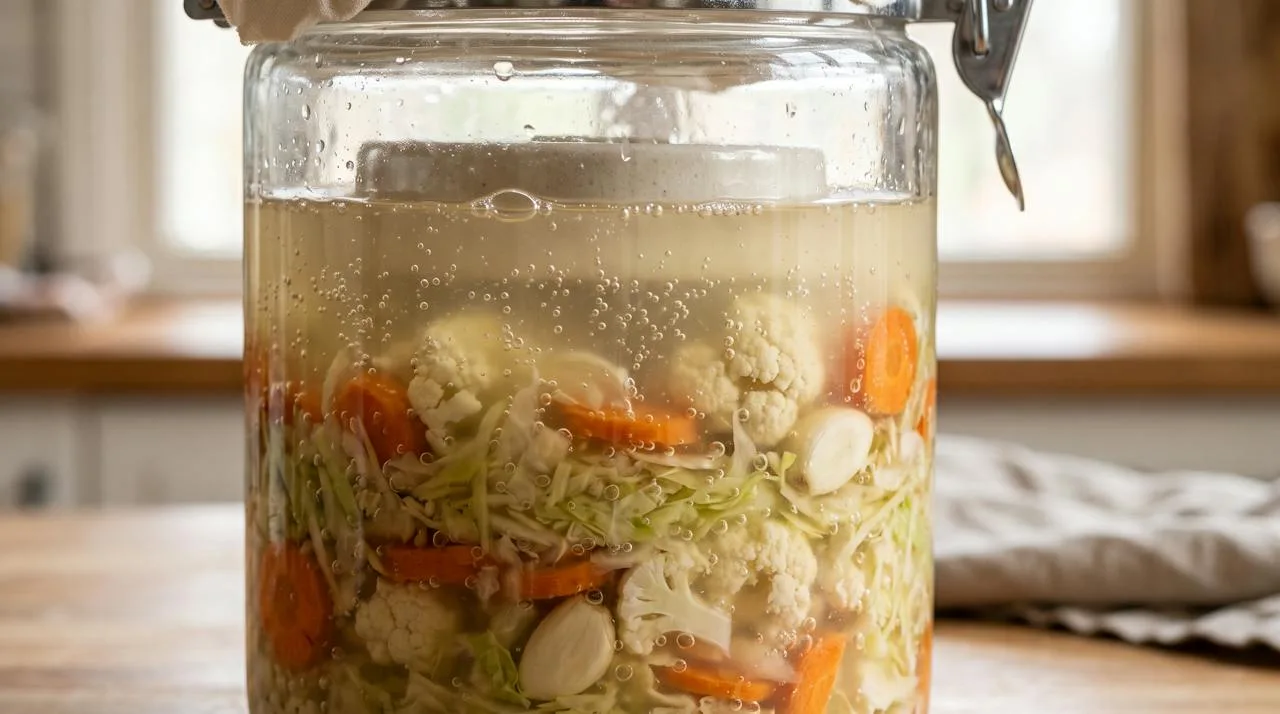
Fermentation uses only salt and time. Lactic acid bacteria that live naturally on vegetables do the rest, producing sour, complex flavors that vinegar can’t imitate.
The basics:
- Salt: UC Davis’s fermented fruit and vegetable factsheet describes salting ferments at 2–10% by weight. For most vegetables I stay in the lower middle of that range, and I always weigh the salt.
- Temperature: NMSU recommends 70–75°F for best results. Cooler kitchens (55–65°F) slow fermentation, and temperatures above 80°F can make pickles soft.
- Time: Anywhere from a few days for crunchy mixed vegetables to 3–4 weeks for fully fermented cucumber pickles.
- Submersion: Everything must stay under the brine. Use a weight.
- Storage: Once the flavor is where you like it, refrigerate to slow fermentation.
UC Davis is careful to point out that home fermentation guidance isn’t a validated process for every recipe, and it recommends following safety-tested recipes whenever possible. I take that seriously, and so should you.
Why bother? Beyond flavor, research is starting to explore how fermented foods affect the gut. A Stanford Medicine study found that people who ate a diet high in fermented foods for 10 weeks showed greater gut microbiome diversity and lower markers of inflammation. Harvard Health similarly highlights fermented foods as a promising part of a gut-friendly diet. It’s early science, but it’s another reason to keep a jar going.
Peppers, Giardiniera, and Antipasto Jars
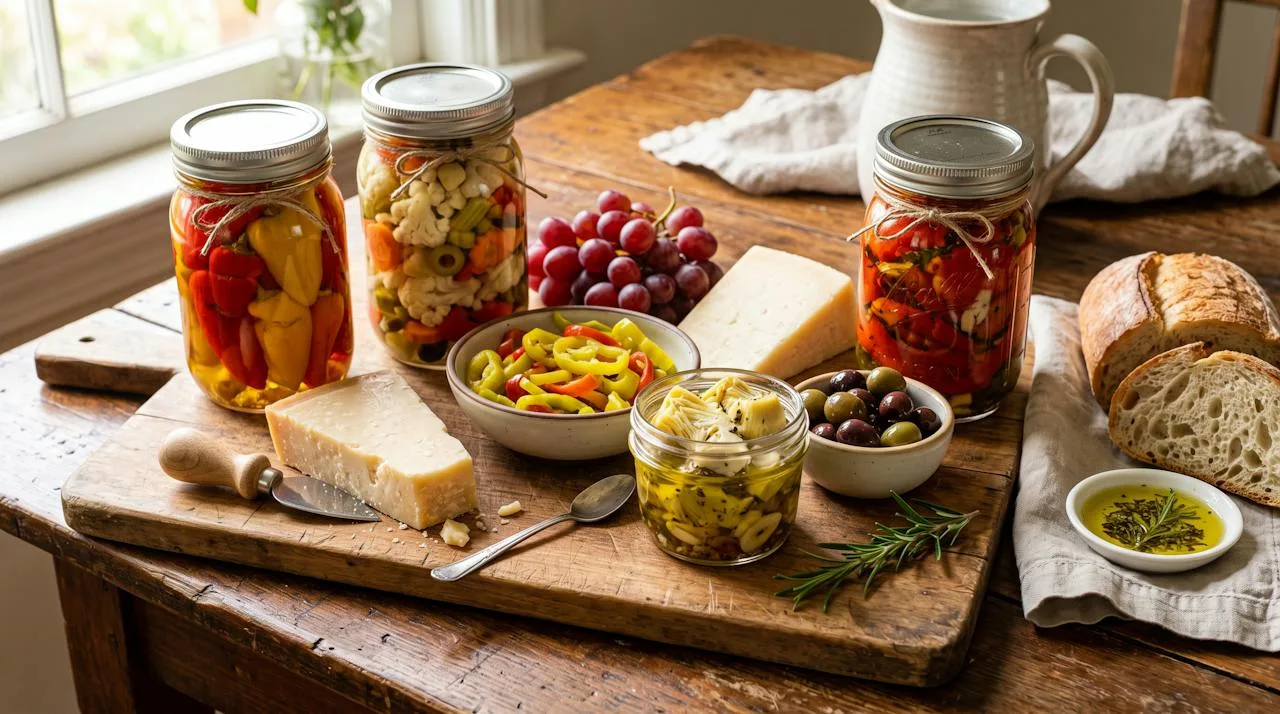
Italian-style pickled peppers and giardiniera (a crunchy mix of cauliflower, carrots, celery, and peppers) are some of the most versatile preserves you can make. Make them as refrigerator pickles in vinegar brine, then drain and dress with olive oil just before serving.
Roasted peppers and artichokes “in oil” deserve a special warning. Vegetables stored under oil are low-acid and create exactly the kind of airless environment where botulism can grow. Unless you’re following a tested recipe that acidifies the vegetables first, keep oil-packed vegetables in the refrigerator and eat them within a few days, just like the garlic-and-herb oils the CDC warns about.
Storage, Labeling, and Safety
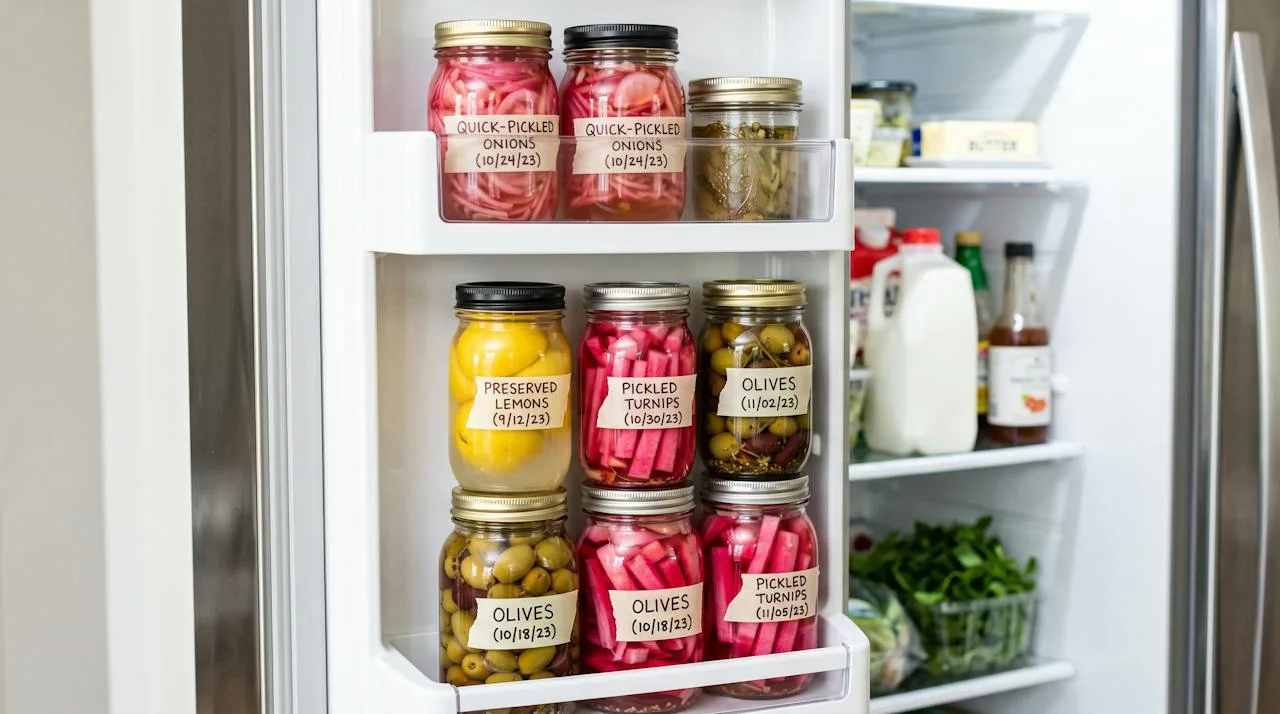
Here’s the part nobody finds romantic, and it’s the part that keeps your family safe.
Refrigerator vs. Shelf-Stable
Think of every preserve in one of two categories:
- Refrigerator preserves: Quick pickles, marinated olives, oil-packed vegetables, finished ferments, and preserved lemons after curing. Keep them cold and eat them within their recommended window.
- Shelf-stable preserves: Only products processed using a tested, research-based canning recipe. The National Center for Home Food Preservation is the best place to find those recipes in the U.S. The UC Food Safety home preservation resource page links to more tested guidance.
If you didn’t use a tested canning recipe, it goes in the refrigerator.
Label Everything
Every jar in my kitchen gets a strip of masking tape with three things: what’s inside, the date it was made, and the method (for example: “Green olives, brine, started Oct 12”). Future-you will not remember, I promise.
Know the Warning Signs
The CDC advises against eating any home-canned or store-bought food if the food or its container shows signs of contamination. Warning signs include:
- Bulging, leaking, or swollen lids and containers
- Liquid spurting or foaming when opened
- Off, rotten, or unusual smells
- Fuzzy mold (not to be confused with a flat white yeast film; see troubleshooting)
- Slimy or mushy texture that wasn’t there before
Remember that the botulism toxin itself can’t be seen, smelled, or tasted, which is exactly why following tested methods matters more than trusting your nose.
A Word on Salt and Health
Brined and salted foods are, well, salty. The American Heart Association recommends no more than 2,300 mg of sodium a day for most adults, moving toward an ideal of 1,500 mg. Mediterranean cooks use preserves as a seasoning, not a main course: a few olives, a spoonful of chopped preserved lemon, a small handful of pickles. Rinsing or soaking olives and preserved lemons before use also removes some of the surface salt.
Fig Preserves: A Sweet Exception With a Safety Twist
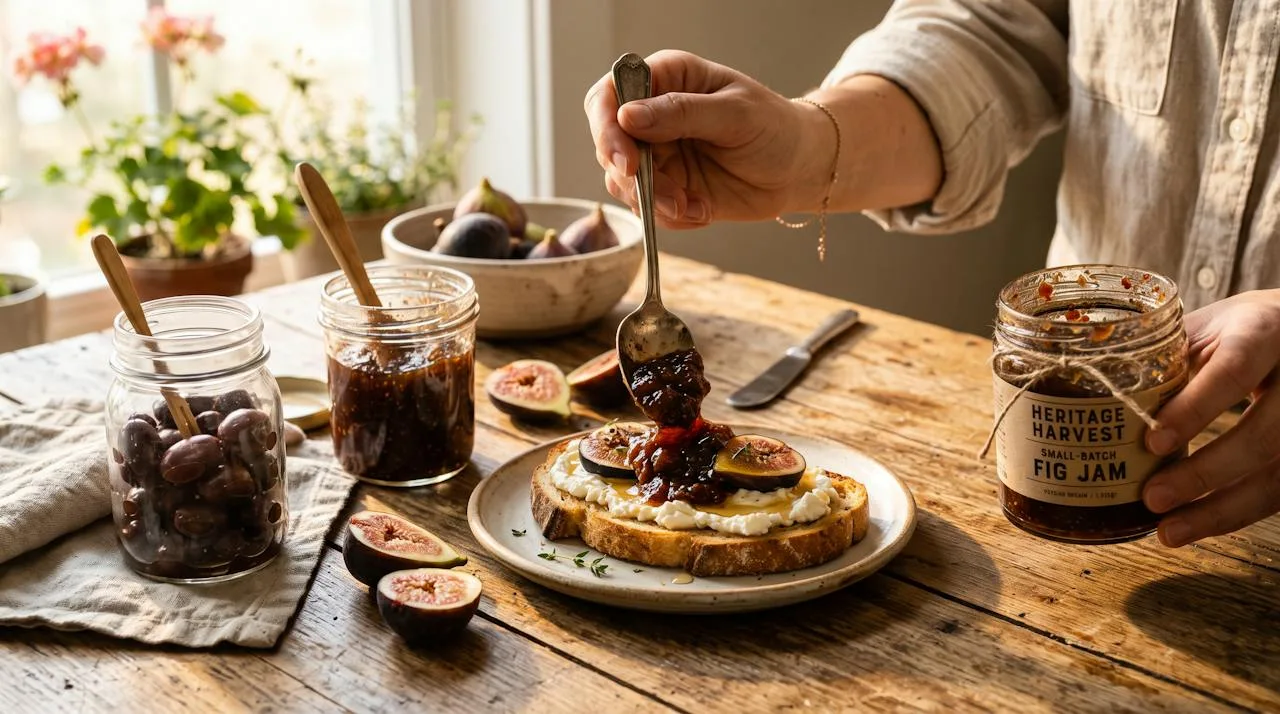
This blog is called Fig & Brine, so I’d be remiss not to mention figs. Here’s something that surprises most people: figs are a low-acid fruit. The CDC lists figs alongside vegetables and meats among the low-acid foods commonly linked to botulism when home-canned improperly.
Oregon State University Extension explains that when canning figs, you must add acid: 1 tablespoon of lemon juice per pint (2 per quart), or ¼ teaspoon of citric acid per pint (½ teaspoon per quart). Its tested fig jam recipe also includes lemon juice. The National Center for Home Food Preservation offers more guidance on preserving figs safely.
For small batches, I make a quick fig jam with lemon juice and keep it in the refrigerator. If you want shelf-stable jars, follow a tested recipe exactly and never skip the added acid.
Using Your Preserves in Everyday Mediterranean Cooking

A pantry full of jars is only worth it if you actually open them, so here’s how they show up in my kitchen every week.
Five Ways to Use Home-Cured Olives
- Chopped into grain salads with herbs, lemon, and olive oil
- Tossed with roasted vegetables in the last 5 minutes of roasting
- Blended into tapenade with capers, garlic, and olive oil
- Braised with chicken and preserved lemon in a tagine
- Served warm with citrus zest and fennel seed as a simple appetizer
Preserved Lemon Everywhere
The Moroccan chicken tagine with preserved lemon and green olives is the classic pairing, but I also chop preserved lemon rind into:
- Roasted potatoes and cauliflower
- Tuna or chickpea salad
- Yogurt sauces for grilled fish
- Pan sauces for chicken
- Herby grain bowls
Pickles as the “Bright Note”
Mediterranean plates are built on contrast: rich olive oil, creamy yogurt or tahini, and something sharp and crunchy to cut through it. Pickled turnips with falafel, pickled onions on grilled fish, giardiniera on a sandwich, and a few pickled peppers alongside a bean stew all play that role.
Build a Preserves Board
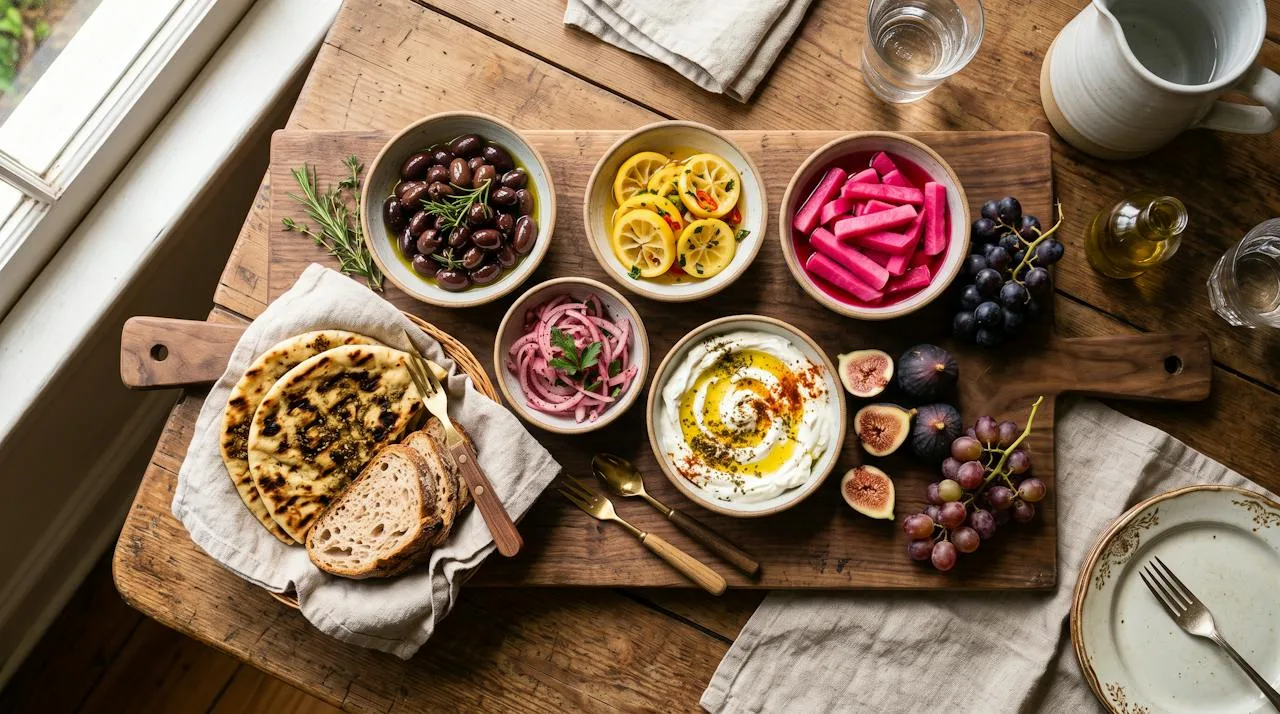
My favorite way to show off a season of work is a preserves board: bowls of marinated olives, sliced preserved lemon, pink turnips, quick-pickled onions, labneh drizzled with olive oil, warm flatbread, and fresh or dried figs. It’s a meal, a conversation starter, and a quiet way of saying, “I made this.”
READER STORY: Luis from Albuquerque, New Mexico, told me he now brings a preserves board to every family gathering. “My aunts used to bring the dessert,” he said. “Now everyone waits to see what’s in my jars.”
Troubleshooting Common Preserving Problems
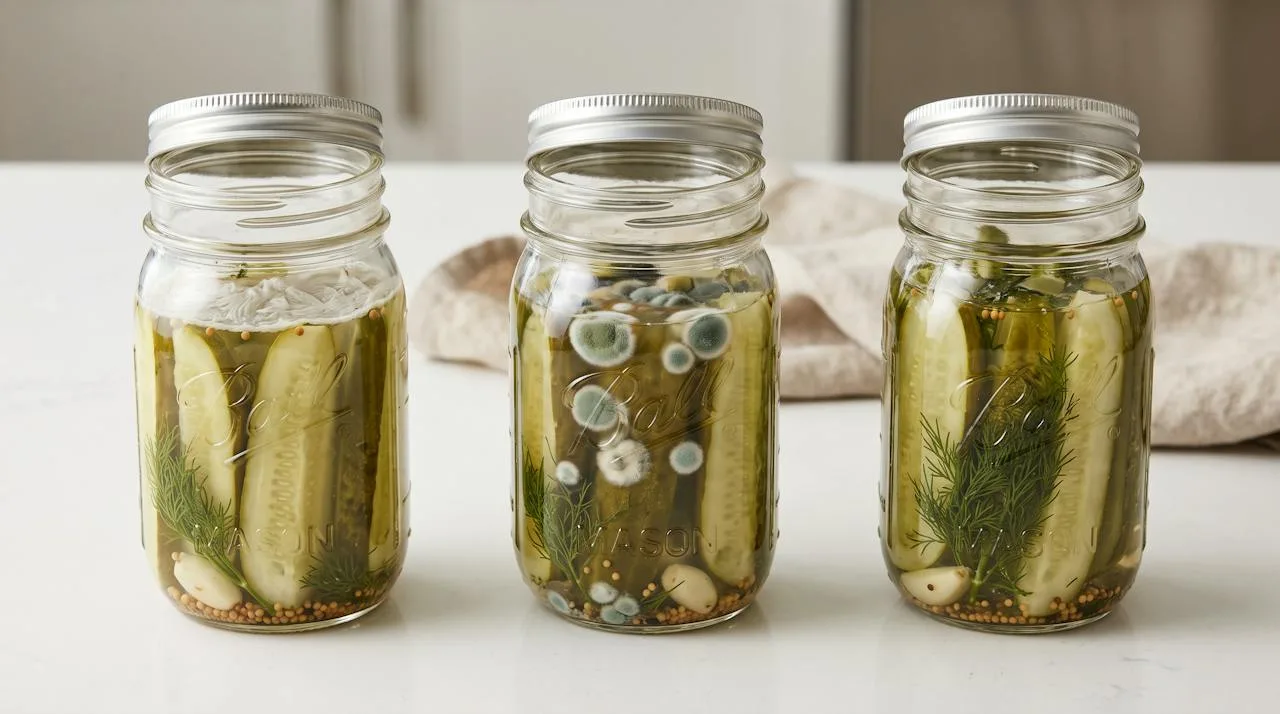
Even careful preservers run into trouble. The key is knowing which problems are cosmetic and which mean the jar goes in the trash.
White Film on the Brine: Kahm Yeast vs. Mold
A flat, white, sometimes wrinkly film on top of fermenting brine is usually kahm yeast. Illinois Extension explains that a white film that isn’t fuzzy or growing in round patches is kahm yeast, which is very common on fermenting vegetables and is safe. Skim it off and keep going, though heavy yeast growth can soften texture and add off-flavors.
Mold is different. The UC Davis troubleshooting guide for fermented foods describes mold as typically green, blue, brown, or black. It says any confirmed mold growth should be discarded immediately, as should ferments with a putrid smell.
How to prevent it:
- Keep everything fully submerged under the brine
- Use enough salt, and weigh it
- Keep jars out of direct sun and away from heat
- Use clean utensils every time you open the jar
Soft, Mushy, or Slippery Pickles
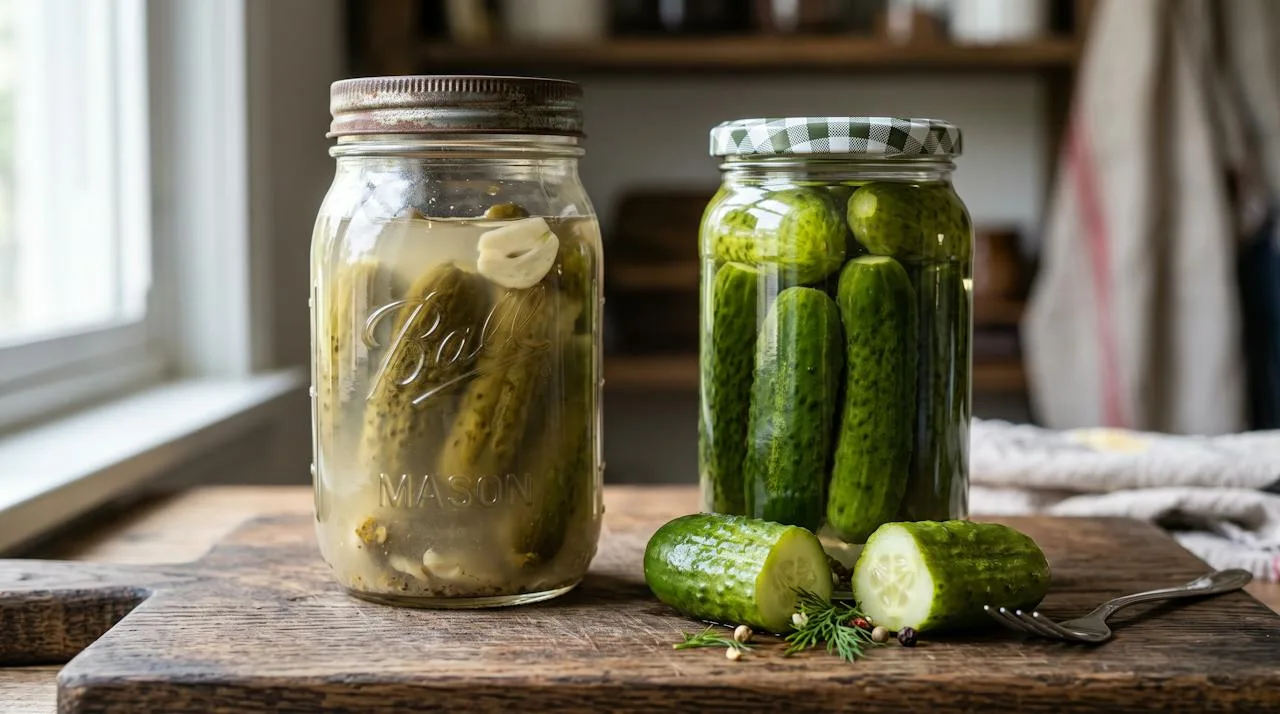
Nobody wants a limp pickle. NMSU lists the most common causes:
- Too little salt or acid
- Vegetables not fully covered by brine
- Scum or yeast not removed
- Fermenting at too high a temperature (above 80°F)
- Blossom ends not removed from cucumbers (NMSU recommends trimming about 1/16 inch)
If pickles are slimy or smell spoiled, don’t try to rescue them. Throw them out.
Olives That Stay Bitter or Turn Soft
- Still bitter after weeks? Green olives take longer than ripe black olives. Make sure each olive was cracked or slit, the brine covers everything, and give them more time.
- Soft olives? Usually over-soaking in water, bruised fruit, or brine that was too weak. UC specifically warns that over-soaking in water leads to soft olives.
- Too salty? Soak in fresh water for several hours or overnight before serving.
Preserved Lemons Look Cloudy or Syrupy
This is normal. As lemons cure, their brine turns thick and cloudy, almost syrupy. What’s not normal is fuzzy mold, which usually means a lemon was sticking out above the liquid. Discard the jar if you see mold, and next time top up with more juice and turn the jar daily.
TROUBLESHOOTING FLOWCHART:
- Flat white film on brine → Kahm yeast → Skim it off, keep everything submerged
- Fuzzy green, blue, black, or pink spots → Mold → Discard the entire jar
- Soft or slimy pickles → Low salt or acid, heat, or exposed vegetables → Discard if slimy; weigh salt and keep ferments at 70–75°F next time
- Olives still bitter → Not cracked, too little time → Crack every olive and wait longer
- Bulging lid, foaming, or off smell → Possible spoilage → Do not taste; discard safely
Your Journey to Mediterranean Preserving Mastery
The Mediterranean Preserving Advantage: 5 Key Takeaways
- Every Mediterranean preserve relies on salt, acid, and time, and safety depends on getting all three right.
- Weigh your salt, and use 5% acidity vinegar. Never dilute tested brines.
- Olives need curing to remove oleuropein bitterness. Water curing is fastest, brine curing is most flavorful, and dry salt curing makes intense black olives.
- If it wasn’t processed with a tested canning recipe, refrigerate it. That includes quick pickles, marinated olives, and anything in oil.
- Use preserves as seasoning: a few olives, a little preserved lemon, and a handful of pickles transform everyday meals.
Your 30-Day Preserving Journey
Week 1: Foundation. Buy pickling salt, 5% vinegar, a kitchen scale, and a few wide-mouth jars. Make a jar of quick-pickled red onions and a jar of refrigerator pickled turnips.
Week 2: Salt and Citrus. Start a jar of preserved lemons. Turn it daily. While it cures, make a batch of quick giardiniera.
Week 3: Fermentation. Start your first lacto-fermented vegetables (a mix of cauliflower, carrots, and garlic is very forgiving). Practice keeping everything submerged, and learn to recognize kahm yeast.
Week 4: Olives. If fresh olives are in season, crack and start a water cure or a two-step brine cure. If not, marinate store-bought cured olives with your preserved lemon and fresh herbs, and plan your olive cure for the fall harvest.
Frequently Asked Questions
Why do olives need to be cured before eating?
Fresh olives contain oleuropein, a naturally bitter compound that makes them practically inedible straight from the tree. Curing removes or breaks down that bitterness. Water curing leaches it out over one to three weeks. Brine curing and fermentation allow lactic acid bacteria to break oleuropein down into non-bitter compounds over two to six months. Dry salt curing draws out moisture and bitterness from ripe black olives over about five to six weeks. Commercial producers often use food-grade lye, which works much faster but requires careful handling. Whatever method you choose, curing also develops the complex, savory flavor we love in Mediterranean olives.
Can I cure store-bought olives at home?
No. Olives sold in jars, cans, or at the deli counter have already been cured, so there’s no bitterness left to remove. What you can do is re-season them. Drain them, rinse off some of the brine, and marinate them with lemon zest, preserved lemon, garlic, herbs, chili, and a splash of vinegar, then drizzle with olive oil before serving. Keep marinated olives in the refrigerator, and because garlic and herbs in oil can pose a botulism risk, mix only what you’ll eat within a few days. To truly cure olives yourself, you’ll need fresh, raw olives, usually available in the fall from farmers markets or growers.
How long does it take to cure olives at home?
It depends on the method and the olives. Following University of California guidance, water curing takes roughly 8 to 10 days of daily water changes, or up to 20 days for milder olives. Brine curing is much slower: a minimum of 2 to 3 months, and up to 6 months for fuller flavor, with green olives taking longer than ripe black ones. Dry salt curing ripe black olives takes about 5 to 6 weeks. Taste regularly toward the end of any cure. Olives are ready when the bitterness has mellowed to a pleasant level and the flesh is firm but not hard.
What’s the minimum salt I need for brine and ferments?
For brine-curing olives, University of California guidance starts with 8 ounces (about ¾ cup) of pickling salt per gallon of water for the first week, then increases to 1 pound (about 1½ cups) per gallon. For vegetable ferments, UC Davis describes salting at 2–10% by weight. For vinegar pickles, the acid does most of the safety work, so salt is more about flavor, but never reduce the vinegar in a tested recipe. Always weigh salt when you can, because different salts have very different volumes, and a cup of flaky kosher salt holds far less salt than a cup of fine pickling salt. Too little salt is one of the most common reasons for soft, spoiled pickles and ferments.
Is it possible to can olives in a water bath?
No, and this is one of the most important safety rules in this guide. University of California guidance says never to use a boiling water bath or steam canner for olives. Lye-cured, non-fermented olives are low-acid foods, and improperly home-canned olives have caused botulism poisoning. If you want shelf-stable olives, follow UC’s tested pressure-canning instructions exactly, including the correct pressure for your elevation. The simpler, safer option for most home cooks is storing cured olives in brine in the refrigerator, or freezing dry-cured olives. UC notes that refrigerated dry-cured olives keep up to about six months, and frozen ones up to a year, so there’s rarely a reason to risk canning them.
How do I make preserved lemons?
Quarter scrubbed lemons from the tip, stopping about half an inch from the base so they stay attached. Pack the cuts generously with coarse salt, press the lemons tightly into a clean jar, and add more salt between layers. Top up with fresh lemon juice until the lemons are fully submerged. Leave the jar at cool room temperature for three to four weeks, turning it daily and keeping the lemons under the liquid. When the rinds are soft and translucent, refrigerate. UC Master Food Preservers note that refrigerated salted lemons keep for at least six months. Rinse before using, and chop the rind into tagines, salads, and sauces.
Can I substitute a different vinegar in pickle recipes?
Yes, as long as the new vinegar has the same or higher acidity, at least 5%, and you don’t change the proportions. White wine, red wine, cider, and white distilled vinegar can all work, though they’ll change the color and flavor. Avoid homemade vinegar or vinegars without a stated acidity, since you can’t know their strength. The University of New Hampshire Extension has warned that some store vinegars are sold at only about 4% acidity, which isn’t strong enough for tested canning recipes. Balsamic vinegar is lovely for marinades but generally isn’t used as the main acid in tested pickling recipes. When you find a flavor combination you love, note the exact vinegar you used so you can repeat it.
Why does my fermenting brine have a white film on top?
A flat, white, sometimes wrinkly film on the surface is usually kahm yeast. Illinois Extension notes that kahm yeast is very common on fermenting vegetables and is safe. Skim it off, make sure everything is submerged, and keep the jar out of warm spots. Mold looks different: it’s fuzzy, grows in round patches, and is often green, blue, black, or pink. If you see mold, discard the whole jar rather than scraping it off. Prevention is the same for both: enough salt, full submersion under a weight, clean utensils, and a cool, steady temperature.
How do I know if my preserves are safe to eat?
Start by following tested recipes and refrigerating anything that wasn’t processed with a research-based canning method. Before eating, check for warning signs: bulging or leaking lids, liquid spurting or foaming when opened, fuzzy mold, slime, or off or rotten smells. The CDC advises against eating any food that shows signs of contamination. Remember that botulism toxin can’t be seen, smelled, or tasted, so a jar that looks and smells fine isn’t automatically safe if it was made incorrectly. When in doubt, throw it out without tasting. It’s never worth risking your health to save a jar of pickles, and a failed batch is always a lesson for the next one.
What’s the best way to start preserving as a complete beginner?
Start with quick refrigerator pickles. They take 15 minutes, don’t require special equipment, and teach you the basics of brine, acid, and flavoring without much risk. Pickled red onions and pink pickled turnips are perfect first projects. Next, make a jar of preserved lemons, which only requires lemons, salt, and patience. Once you’re comfortable, try a small batch of lacto-fermented vegetables. Save olives for when fresh ones are in season in the fall, and begin with a water cure before moving on to a full brine cure. Buy pickling salt, 5% vinegar, and a kitchen scale before you begin.
Professional Tips for Advanced Success
OVERNIGHT TECHNIQUE: Before quick-pickling cucumbers or peppers, soak them in ice water for a couple of hours or overnight in the refrigerator. Cold, well-hydrated vegetables stay noticeably crisper in the brine.
SCIENCE TIP: If you want to check your ferments more precisely, pH test strips or an inexpensive pH meter can show you when a ferment has soured. Remember that the safety line for acid foods is pH 4.6 or below, and a tested recipe is still your best guarantee.
ADVANCED TECHNIQUE: Toast whole spices like coriander, cumin, and fennel seed in a dry pan for a minute before adding them to brine. The flavor blooms and perfumes the entire jar.
RATIO TIP: When you find a salt ratio you love for ferments, write it down as a percentage of the total weight of vegetables and water. Percentages scale perfectly from a pint jar to a big crock, while cups and tablespoons never do.
MEDITERRANEAN SECRET: Start a “house olive” marinade and change one element each season: orange zest in winter, fresh oregano in spring, chili and fennel in summer, and preserved lemon in fall. Your olives will never taste the same way twice.
Take Action: Start Your Preserving Journey Today
Pick the path that fits your kitchen right now:
- Beginner: Tonight, make a jar of quick-pickled red onions with 5% vinegar, salt, and a bay leaf. They’ll be ready by dinner tomorrow.
- Intermediate: This week, start a jar of preserved lemons and a jar of pink pickled turnips, and label both with today’s date.
- Advanced: This fall, source fresh olives and start a two-step brine cure, plus a crock of lacto-fermented vegetables at 70–75°F.
Track Your Progress
- Keep a simple preserving notebook: recipe, date started, salt weight, and brine strength
- Taste and note flavor changes each week
- Record the temperature where your jars are sitting
- Write down what you’d change next time
Continue Learning If you’re new to the bigger picture of how these jars fit into everyday meals, my Mediterranean diet guide for beginners (linked at the top of this post) is the perfect companion. More Fig & Brine guides on olive oil, herbs, and Mediterranean vegetables are on the way.
That first home-cured olive is still one of my proudest kitchen moments. Not because it was perfect (the next batch was better), but because it tasted like time. Nine weeks of changing brine, checking jars, and trusting the process turned a bitter fruit into something I wanted to share with everyone I love.
That’s what preserving gives you. It slows you down. It connects you to every grandmother on every Mediterranean hillside who ever stood over a jar of brine and wondered if this batch would be the one. Start with one jar. Label it. Wait. And when you open it for the first time, I want to hear all about it.
With salt on my hands and figs on the counter, Nevaeh Hall


