
Lebanese Pink Pickled Turnips (Kabees el Lift): How Much Beet for That Bright Pink
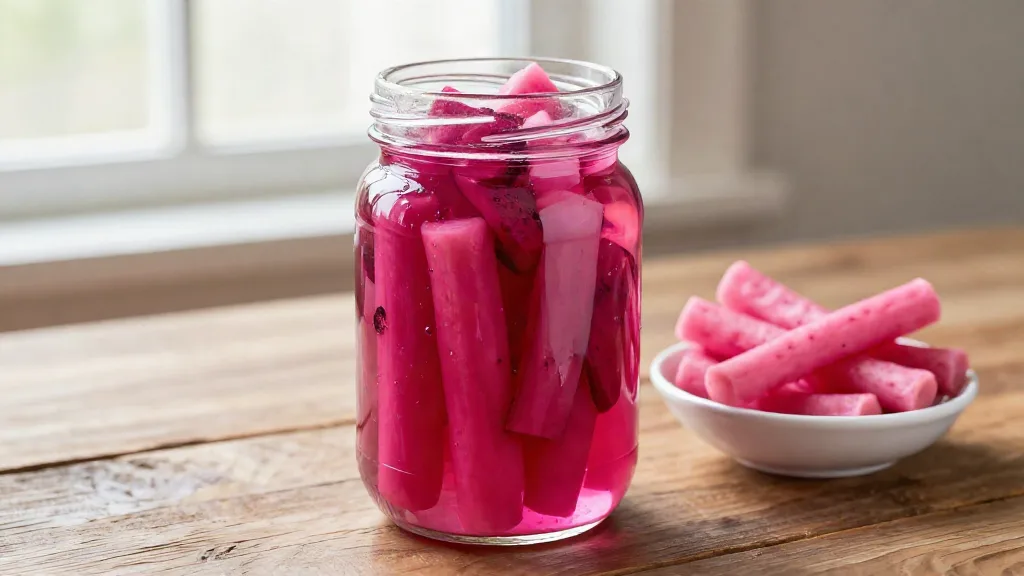
Kabees el lift are the shocking-pink pickles tucked into every falafel wrap and scattered across every Lebanese mezze table: crunchy, sour, salty and almost unreal in color. That color doesn’t come from dye. It comes from a little raw beet sitting in the jar with the turnips, slowly bleeding into the brine.
The question I wanted to answer was simple: how much beet? Too little and you get a pale blush. Too much and I worried the turnips would taste earthy. So I made two jars side by side with identical turnips, brine, garlic and bay leaf, and changed only the beet.
My finding: 30 g of beet per 250 g of turnips gave a deep pink without an earthy taste, while 5 g gave only a soft blush. The vinegar and salt stayed in front, and the color kept deepening for a full week. They were ready to eat on day 5 and at their best by day 7.
These are refrigerator pickles, not a canned or shelf-stable recipe. If you want to understand where they fit, my Mediterranean preserving and brining guide covers the difference. Follow this recipe, and you’ll have a jar of crunchy, bright pink turnips in your fridge within a week.
What I Learned From Testing This Recipe
Recipe Testing Note Tested in 2 jars side by side, filled on October 1, 2026 and checked daily through October 15, 2026 (14 days). The final version is Jar B. Equipment: two 750 ml glass jars with matching lids, a refrigerator thermometer, a kitchen scale, a mesh colander. Key variable tested: 5 g vs. 30 g raw beet per 250 g turnips, with everything else identical. Measured: turnip and beet weights, brine per jar (285 ml and 295 ml), fridge temperature (about 4°C), color and texture on days 1, 2, 3, 5, 7 and 14, and drained yield (244 g and 263 g).
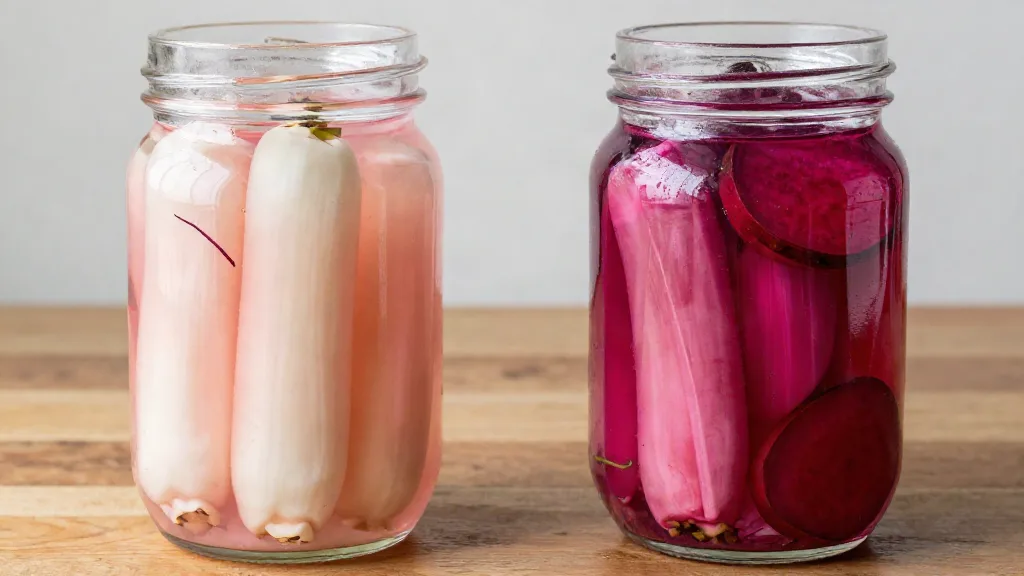
I cut 500 g of peeled white turnips into even batons, about 0.8 to 1 cm thick and 4 to 5 cm long, and split them between two jars. Jar A got 5 g of raw beet, one thin slice. Jar B got 30 g, several thin slices. One batch of cold brine went into both jars, along with one small garlic clove and one small bay leaf each, and both went straight into the fridge.
Jar A was the problem. On day 1, its brine was only starting to turn pale pink and the turnips were mostly white. By day 3 they were pale pink overall, but the thicker pieces still had light centers, and on day 7 some centers were still pale. Jar B colored faster and more evenly: medium pink by day 3, bright and uniform by day 5, and deep pink approaching magenta by day 7. The beet was noticeable in the aroma early on, but it never took over the flavor.
What I changed after testing: Beet went from 5 g to 30 g per 250 g of turnips. With 5 g, the turnips stayed pale with light centers even after a week; with 30 g, they turned deep pink by day 7 and still tasted mainly sour and salty, not earthy.
How this recipe evolved
Tap each stage to see how the two jars changed.
October 1: two jars filled
250 g turnip batons per jar, same cold brine, garlic and bay leaf.
Jar A: 5 g beet. Jar B: 30 g beet.
Day 3 (October 4)
Jar A: pale pink, thicker pieces still light inside.
Jar B: medium pink, more even, beet only in the aroma.
Day 5 (October 6): ready to eat
Both jars tasted more integrated.
Jar B: bright, uniform pink, firm, subtle beet.
Day 7 (October 8): the final recipe
Jar A: medium pink with lighter centers.
Jar B: deep pink approaching magenta, still crunchy, faint earthy note. 30 g beet wins.
Side-by-Side Results
| Day | Jar A: 5 g beet | Jar B: 30 g beet |
|---|---|---|
| 1 | Brine turning pale pink, turnips mostly white; very crunchy, sharp vinegar and salt | Brine pinker, faster; pink staining beside the beet; firm, sharp, a little earthy aroma |
| 2 | Pale blush at the edges, white centers; very crisp and tangy | Brighter pink brine, more color on the outside; firm, slightly stronger beet aroma |
| 3 | Pale pink, thicker pieces still light inside; crunchy, tart, sharp | Medium pink, more even; crunchy; beet in the aroma but not dominating |
| 5 | Pale to medium pink; crisp; salt and sourness better integrated | Brighter, uniform pink; firm; pronounced sourness, subtle beet |
| 7 | Medium pink, some lighter centers; crisp and pleasantly sour | Deep pink approaching magenta; still crunchy, faint earthy note (my pick) |
| 14 | Medium pink, consistent; firm, more integrated | Deep pink to magenta throughout; firm, mild beet under the acidity |
Taster Notes
Three family members tasted both jars. All three were drawn to Jar B for its brighter pink. One liked its firm texture for grilled food and sandwiches, one preferred the sharp, vinegar-forward flavor and noticed only a faint beet aroma, and one preferred the crunchiest pieces and found both versions sour.
Ingredients
Makes 1 jar (750 ml), about 263 g drained pickles
For the jar
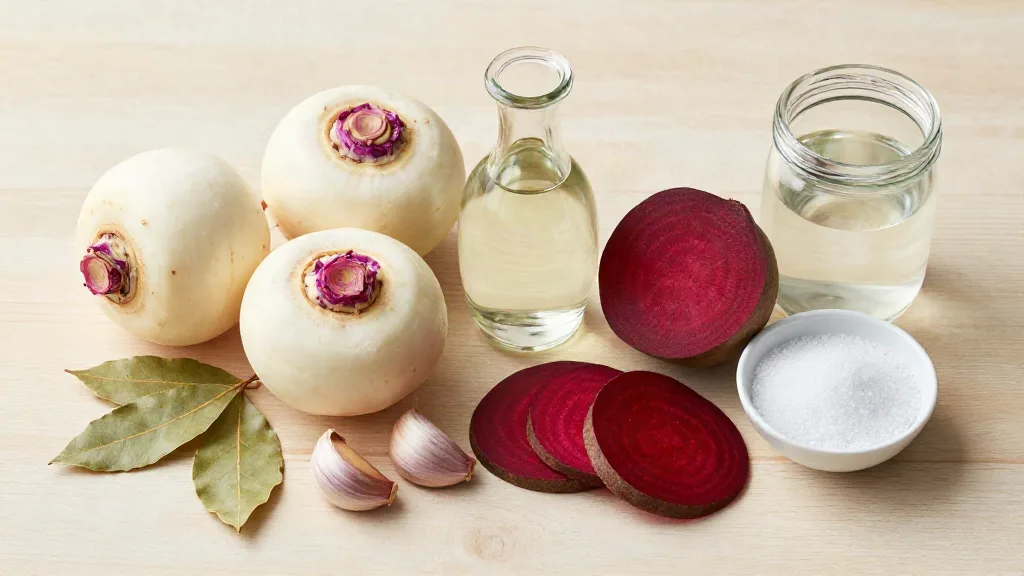
- 250 g white turnips, peeled, tops and root ends removed
- 30 g raw beet, peeled and cut into several thin slices (weighed after peeling)
- 1 small garlic clove, peeled
- 1 small bay leaf
For the brine (enough for 2 jars)
- 500 ml water
- 167 ml white distilled vinegar, 5% acidity (check the label)
- 20 g fine non-iodized salt with no anti-caking agents
Each jar took about 285 to 295 ml of brine. For two jars, double the turnips, beet, garlic and bay leaf and use the full batch of brine; I had 87 ml left over after filling two.
Shopping list
Send the list to yourself via WhatsApp or email.
- 250 g white turnips
- 1 small raw beet (you need 30 g)
- 1 small garlic clove
- 1 small bay leaf
- White distilled vinegar, 5% acidity (167 ml)
- Fine non-iodized salt, no anti-caking agents (20 g)
- A clean 750 ml glass jar with lid
By the Numbers
- Beet: 5 g (pale blush) vs. 30 g (deep pink) per 250 g turnips
- Brine: 500 ml water, 167 ml 5% vinegar, 20 g salt, about 3% salt by weight of the liquid
- Per jar: 285 ml (Jar A) and 295 ml (Jar B) of brine, 1.5 cm headspace
- Fridge: about 4°C, checked with a thermometer
- Ready to eat: day 5. Best color and flavor: day 7
- Drained yield: 244 g (Jar A) and 263 g (Jar B), drained 2 minutes without pressing
Cost Check
The ingredients I used for both jars (500 g turnips, 35 g beet, the brine, garlic and bay leaves) came to $3.02 at Walmart on September 30, 2026, or about $1.51 per jar. That covers only the amounts used, not jars or lids.
Before You Start: What to Watch For
- Use 5% vinegar and don’t change the ratios. The National Center for Home Food Preservation recommends white distilled or cider vinegar of 5% acidity and warns against altering vinegar, food or water proportions or using vinegar of unknown acidity.
- Pick salt without anti-caking agents. NCHFP notes that anti-caking additives can make brine cloudy. If your salt is coarse or flaky, weigh it, because its volume varies a lot.
- Cut evenly. Batons of the same size color and soften at the same rate. Thicker pieces kept pale centers longest in Jar A.
- Keep everything under the brine. Pack the turnips firmly but don’t crush them, and leave about 1.5 cm of headspace.
- Keep it cold. These are refrigerator pickles. Mine stayed at about 4°C the whole time and were never left at room temperature.
- Use a clean utensil. Never dip fingers or a used fork into the jar.
- Be patient with the color. It keeps deepening through the first week. Judge it on day 7, not day 3.
Doneness Cues at a Glance
| Day | Look | Bite | Taste |
|---|---|---|---|
| 1 | Brine turning pink, turnips mostly white | Very crunchy | Sharp vinegar and salt |
| 3 | Medium pink, more even | Crunchy | Tart, beet noticeable only in the aroma |
| 5 (ready) | Bright, uniform pink | Firm | Sour and salty, better integrated |
| 7 (best) | Deep pink, approaching magenta | Still crunchy | Sour, salty, faint earthy note |
Method
- Make the brine. Stir 500 ml water, 167 ml white distilled vinegar (5%) and 20 g salt together until the salt has fully dissolved. Let it cool completely; it goes into the jar cold.
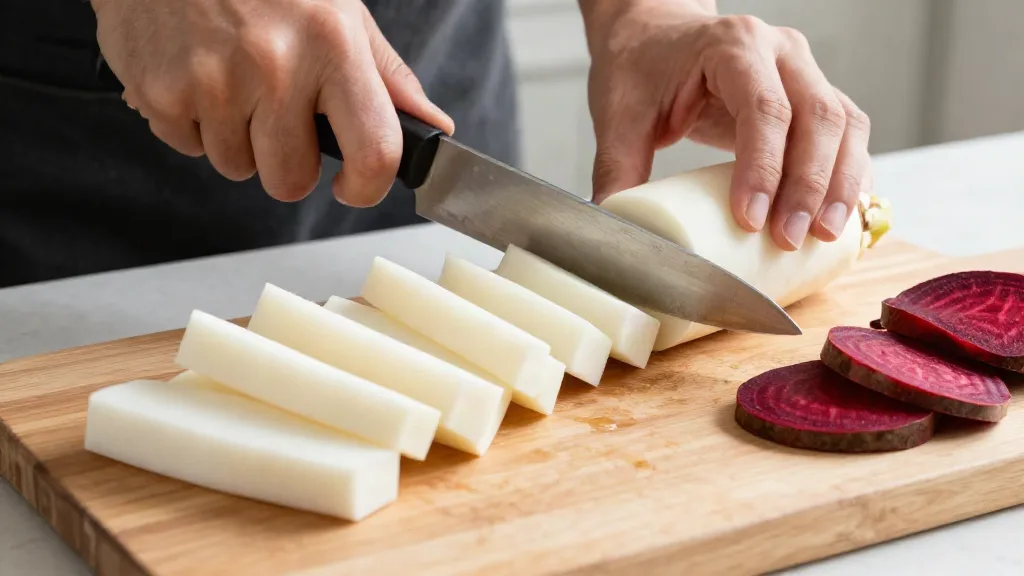
- Prepare the turnips. Peel 250 g turnips, trim the tops and root ends, and cut them into even batons about 0.8 to 1 cm thick and 4 to 5 cm long.
- Prepare the beet. Peel the beet, weigh out 30 g, and cut it into several thin slices.
- Pack the jar. In a clean 750 ml glass jar, add 1 small garlic clove and 1 small bay leaf. Pack the turnip batons in evenly, tucking the beet slices between them so they’re spread through the jar. Pack firmly without crushing.
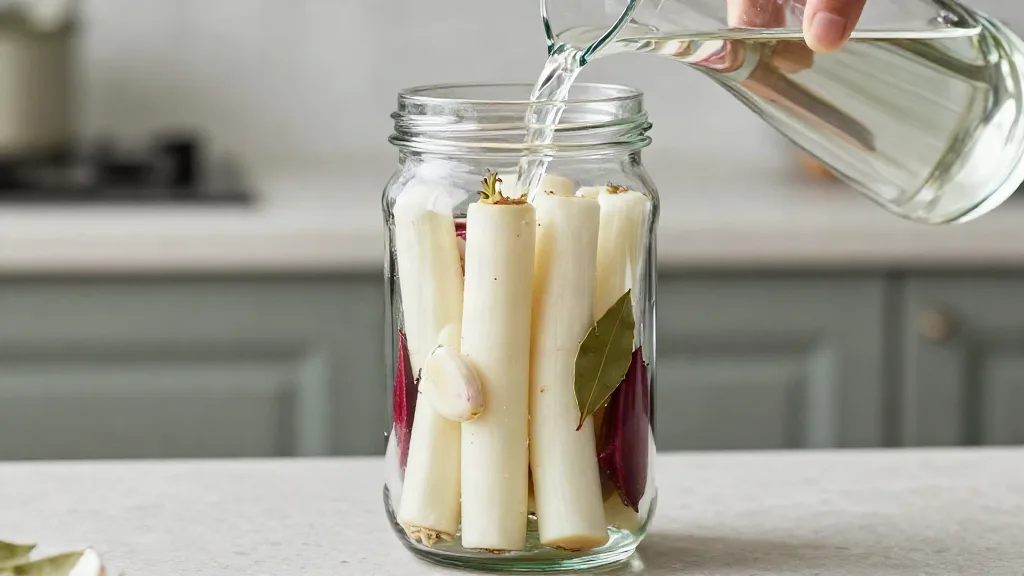
- Add the brine. Pour in the cold brine until every piece is fully submerged, leaving about 1.5 cm of headspace. My jar took about 295 ml.
- Close and refrigerate. Seal with a clean lid and refrigerate straight away, at about 4°C.
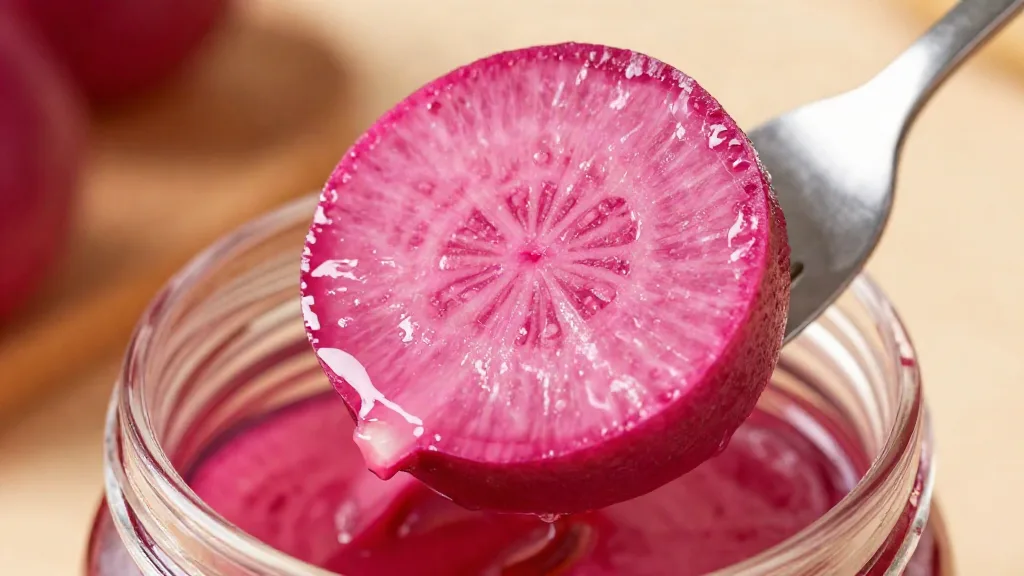
- Watch the color. On day 1, the brine starts turning pink. By day 3, the turnips are medium pink, and they keep deepening.
- Taste on day 5. The pickles were ready to eat on day 5: bright pink, firm and sour, with the salt and vinegar settled.
- Serve from day 7 for the best result. By day 7, the color was a deep pink approaching magenta, the turnips were still crunchy, and the beet was just a faint earthy note under the acidity.
Tested Substitutions
| Original ingredient | Tested substitute | Result |
|---|---|---|
| 30 g beet | 5 g beet (tested) | Only a soft blush; pale centers on thicker pieces even after a week. Choose it if you want a gentler pink. |
| Raw beet | Cooked beet (untested) | I haven’t tried this yet. |
| White distilled vinegar | Apple cider vinegar (untested) | I haven’t tested it. NCHFP lists cider vinegar of 5% acidity as suitable for pickling, but I can’t tell you how it changes the color or taste. |
| Batons | Wedges (untested) | I haven’t tried this yet. |
| No chili | Chili added (untested) | I haven’t tried this yet. |
| No sugar | Sugar added (untested) | I haven’t tried this yet. |
| Cold brine | Hot brine (untested) | I haven’t tried this yet. |
Why This Recipe Can Fail (And How to Fix It)
Common Problems
- Too pale: 5 g of beet per 250 g turnips gave only a soft blush, with light centers on thicker pieces after a week. Use 30 g and give it the full 7 days.
- Uneven color: Thicker batons kept pale centers longest. Cut the turnips evenly, about 0.8 to 1 cm thick, and spread the beet slices through the jar instead of leaving them in one spot.
- Too sharp on day 1: Fresh vinegar pickles taste harsh at first. Wait; mine tasted noticeably more integrated by day 5.
- Cloudy brine: Salt with anti-caking agents can cloud the brine, according to NCHFP. Use a fine salt with no additives. If cloudiness comes with bubbles, slime, mold or an odd smell, treat it as spoilage, not a salt issue.
- Signs of spoilage: A separate exploratory jar I made before this test turned cloudy on day 6, with persistent bubbles, growth on the surface and an unusual apple-like smell. I threw it out without tasting. Do the same: NC State Extension’s pickle troubleshooting guide advises that if spoilage is evident, do not eat.
- Pieces above the brine: Exposed turnips are the ones that go wrong. Pack firmly and top up with brine so every piece stays submerged.
What went wrong?
Tap your problem to see the cause and the fix.
Too pale
Cause: 5 g of beet per 250 g turnips gave only a soft blush, with light centers after a week.
Fix: Use 30 g of beet and give it the full 7 days.
Uneven color
Cause: Thicker batons kept pale centers longest.
Fix: Cut evenly, about 0.8 to 1 cm thick, and spread the beet slices through the jar.
Too sharp on day 1
Cause: Fresh vinegar pickles taste harsh at first.
Fix: Wait; they tasted noticeably more integrated by day 5.
Cloudy brine
Cause: Salt with anti-caking agents can cloud brine.
Fix: Use a fine salt with no additives. If cloudiness comes with bubbles, slime, mold or an odd smell, treat it as spoilage.
Signs of spoilage
Cause: An exploratory jar turned cloudy on day 6, with bubbles, surface growth and an odd smell.
Fix: Discard it without tasting. If spoilage is evident, do not eat.
Pieces above the brine
Cause: Exposed turnips are the ones that go wrong.
Fix: Pack firmly and top up with brine so every piece stays submerged.
Serving Suggestions
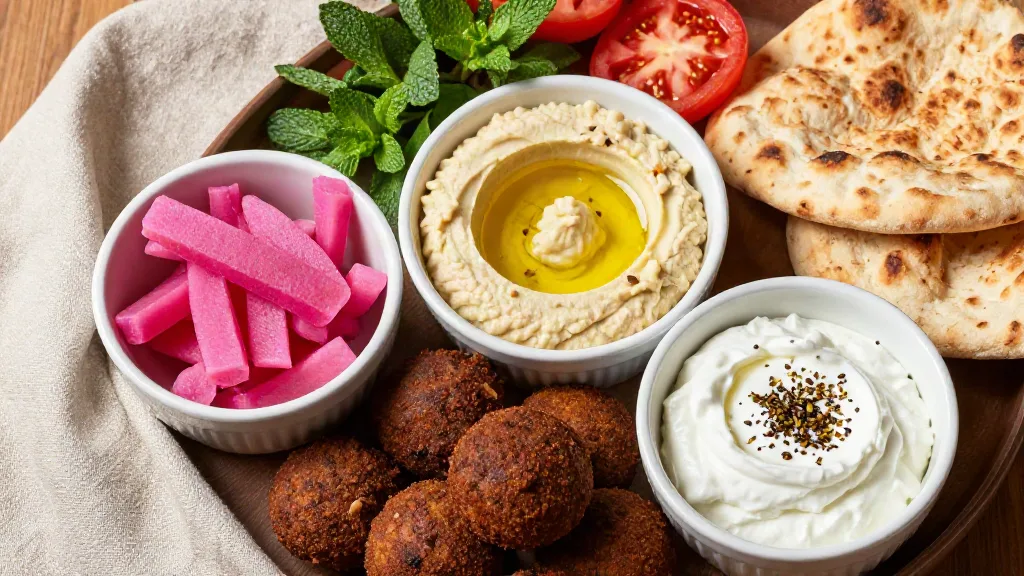
Kabees el lift belong in a falafel wrap: tuck a few batons in with crispy falafel made from dried chickpeas, tahini and herbs. They also cut through rich dips on a mezze table, next to creamy hummus from dried chickpeas and a bowl of homemade labneh with olive oil.
Storage, Reheating & Make-Ahead
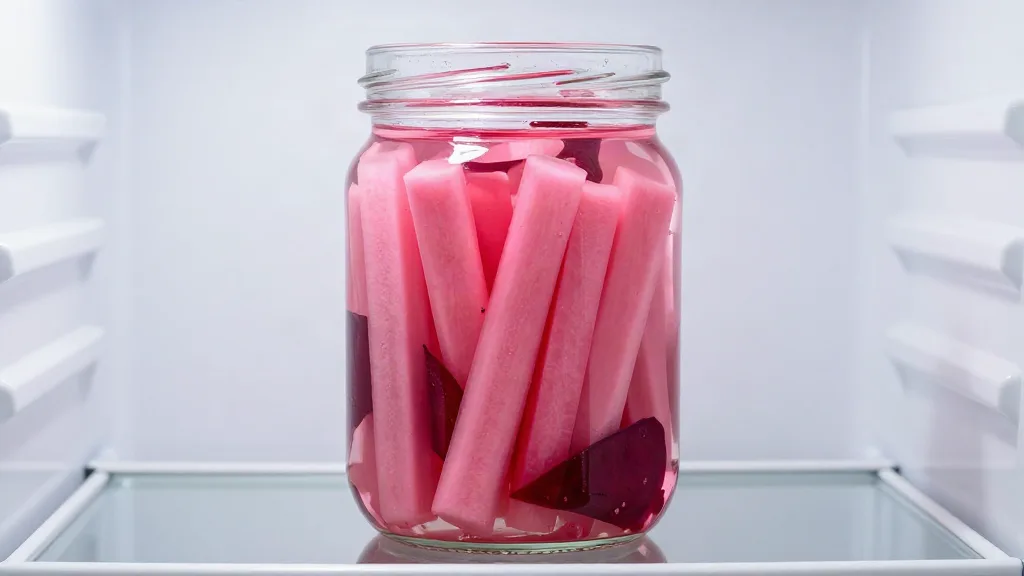
Keep the jar in the fridge at all times, with the turnips under the brine, and take pickles out with a clean utensil. I tracked my jars for 14 days in the fridge at about 4°C. Over that time, Jar B stayed firm and crunchy, the pink deepened to magenta and the flavor became more integrated, with the beet staying mild under the acidity.
This brine is milder than many quick-pickle brines: about 3 parts water to 1 part vinegar. For comparison, NC State Extension’s quick refrigerator pickles use equal parts vinegar and water and say to use them within 2 weeks. I only checked mine over 14 days, so I’d treat 2 weeks as the limit, and these are not suitable for room-temperature storage or canning. Freezing wasn’t tested, and there’s nothing to reheat.
To get ahead, make the jar at least 5 days before you need it, or a week ahead for the best color.
What I’d Test Next
- Raw vs. cooked beet at the same 30 g, to see which colors faster.
- Batons vs. wedges, since thickness affected how evenly the color reached the centers.
- A little chili in one jar, for a spicier version.
Continue Cooking
- How to make preserved lemons
- Homemade za’atar spice blend
- Mujadara, lentils and rice with crispy onions
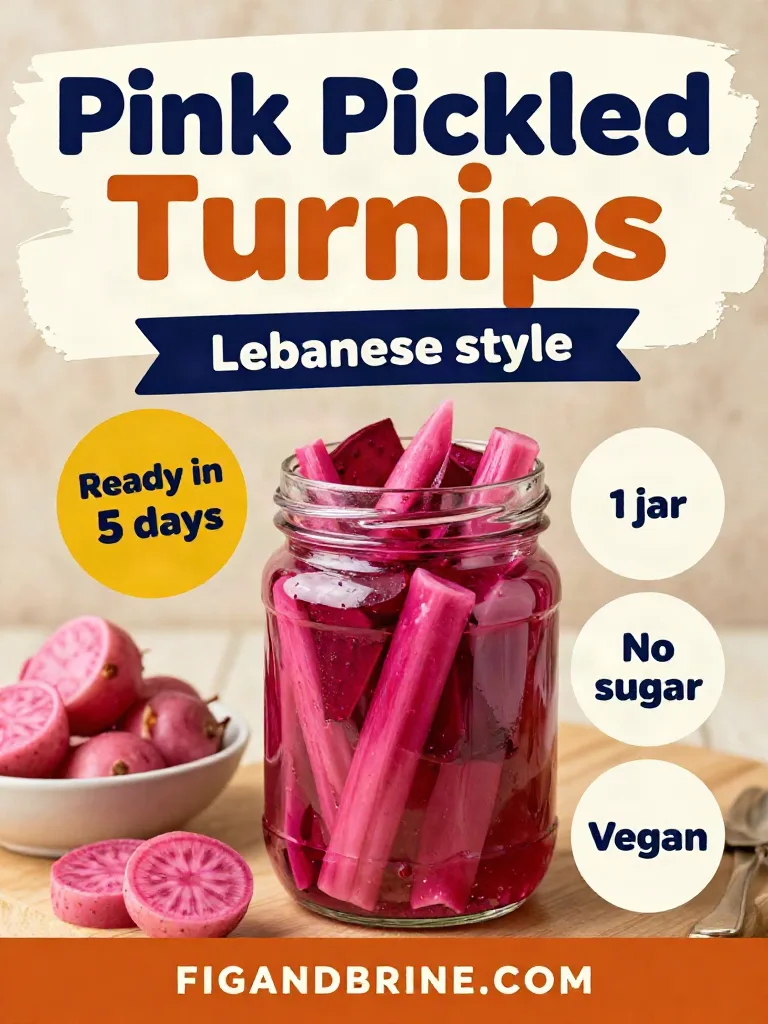

Lebanese Pink Pickled Turnips (Kabees el Lift)
- Total Time: 20 minutes
- Yield: 1 jar (750 ml), about 263 g drained
- Diet: Vegan
Description
Crunchy, sour Lebanese pickled turnips colored bright pink with raw beet. Tested side by side, 30 g of beet per 250 g of turnips gave a deep pink by day 7 without an earthy taste. These are refrigerator pickles, not a canned or shelf-stable recipe.
Ingredients
For the jar:
- 250 g white turnips, peeled, tops and root ends removed
- 30 g raw beet, peeled and thinly sliced (weighed after peeling)
- 1 small garlic clove, peeled
- 1 small bay leaf
For the brine (enough for 2 jars):
- 500 ml water
- 167 ml white distilled vinegar, 5% acidity
- 20 g fine non-iodized salt, with no anti-caking agents
Instructions
- Stir the water, vinegar and salt together until the salt fully dissolves. Let the brine cool completely.
- Cut the turnips into even batons, about 0.8 to 1 cm thick and 4 to 5 cm long.
- Put the garlic and bay leaf in a clean 750 ml glass jar. Pack in the turnip batons, tucking the beet slices between them. Pack firmly without crushing.
- Pour in the cold brine until every piece is submerged, leaving about 1.5 cm of headspace. One jar takes about 295 ml.
- Seal with a clean lid and refrigerate straight away, at about 4°C.
- The pickles are ready to eat on day 5 and at their best color and flavor on day 7.
Notes
- Ready on day 5, best on day 7. The color keeps deepening through the first week.
- For a gentler pink, use 5 g of beet instead of 30 g.
- Refrigerator only. These are not suitable for canning or room-temperature storage. I tracked them for 14 days in the fridge, so treat 2 weeks as the limit.
- Use 5% vinegar and don’t change the ratios.
- Always use a clean utensil and keep the turnips under the brine.
- If you see mold, slime, bubbles or an odd smell, discard the jar without tasting.
- For two jars, double the turnips, beet, garlic and bay leaf. The brine batch covers both.
- Prep Time: 20 minutes
- Cook Time: 0 minutes
- Category: Condiment
- Method: Pickling
- Cuisine: Lebanese


